写在前面 趁着这次培训,把学的东西都整理一下。不断更新,想到啥更新啥。。。。。。
软件推荐
ssh工具:目前在用的是Tabby ,比较满意的是在一个窗口就可以实现ssh+文件的上传下载。markdown工具:现在在用的是Typora ,付费版本。代码编辑工具:
软件安装 VScode 使用VScode主要是为了方便远程连接服务器进行远程开发。体验了几次,还是很爽的。
安装Remote-SSH
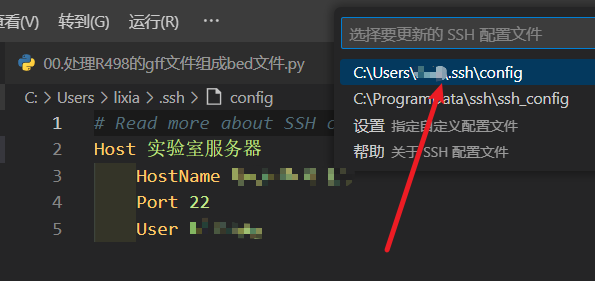
设置配置文件:输入服务器名称、IP地址、端口和用户名即可。
更改设置:更改设置,File->Preferences->Settings->Extension->Remote-SSH,找到 Show Login Terminal 并勾选。
后续提示输入密码,然后就可以 登录使用了。代码编辑器和终端在一个页面,就很方便。
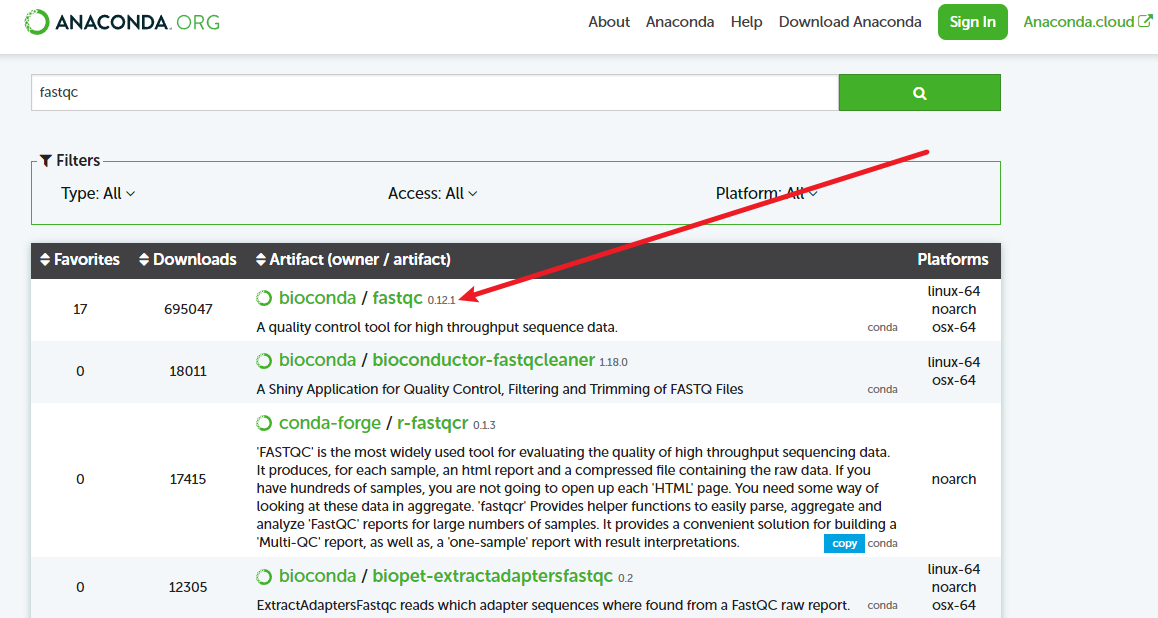
conda 初学生信最折腾的就是软件安装,现在我基本上都是用mamba进行安装。mamba本质是conda,但是解析速度非常快,下载速度也非常快。
现在直接从官方网站 下载即可安装,之前还需要先安装conda,官方也不推荐使用conda安装mamba.
以Ubuntu系统为例:
1
2
wget "https://github.com/conda-forge/miniforge/releases/latest/download/Mambaforge-$(uname) -$(uname -m) .sh" uname )-$(uname -m).sh
1 mamba create --name 环境名称 python=3.11
1
2
3
4
conda config --add channels https://mirrors.tuna.tsinghua.edu.cn/anaconda/pkgs/free/
把conda改成mamba就行:
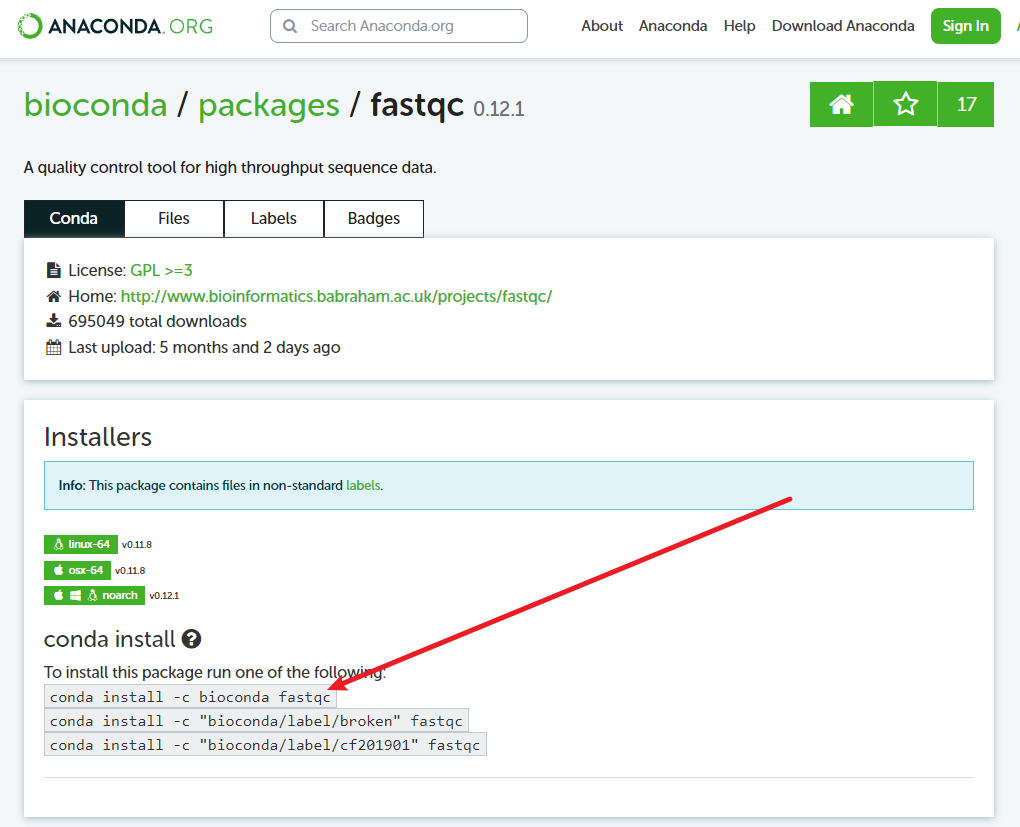
1 mamba install -c bioconda fastqc
不更新依赖安装:某些大项目往往需要很多软件,各个软件依赖的其他软件版本通常不一样,这个时候可以考虑不更新依赖进行安装:
1 mamba install -c bioconda fastqc --freeze-installed
其他不能用mamba安装的软件就只能根据官方文档进行安装了。
Docker 在Ubuntu上安装Docker
1 2 3 4 5 6 7 8 9 10 11 12 13 14 15 chmod a+r /etc/apt/keyrings/docker.gpgecho \"deb [arch=" $(dpkg --print-architecture)" signed-by=/etc/apt/keyrings/docker.gpg] https://download.docker.com/linux/ubuntu \ " $(. /etc/os-release && echo "$VERSION_CODENAME " )" stable" | \tee /etc/apt/sources.list.d/docker.list > /dev/null
将用户加入docker用户组:
1 sudo usermod -aG docker username
查看哪些用户在docker用户组中:
1 grep '^docker:' /etc/group
将特定的目录挂载的到docker的工作目录下:
1 docker run -it --name cactus.test -v ~/lixiang/yyt.acuce.3rd:/data quay.io/comparative-genomics-toolkit/cactus:v2.6.11
docker的默认目录是/data,-v参数将~/lixiang/yyt.acuce.3rd目录挂载到/data目录下。
输入exit退出当前容器。使用docker rm name删除对应的容器名称。
文件格式 gVCF 表头都有详细的注释信息,正文部分如下:
1 2 3 4 5 Chr1 1 . A <*> 0 . END=914 GT:GQ:MIN_DP:PL 0 /0 :1 :0 :0 ,0 ,0 Chr1 915 . T <*> 0 . END=915 GT:GQ:MIN_DP:PL ./.:0 :1 :29 ,3 ,0 Chr1 916 . A <*> 0 . END=977 GT:GQ:MIN_DP:PL 0 /0 :1 :0 :0 ,3 ,29 Chr1 978 . A <*> 0 . END=978 GT:GQ:MIN_DP:PL ./.:0 :1 :29 ,3 ,0
每一列的含义如下:
#CHROM: 染色体的名字。POS: 变异发生的位置。ID: 变异的唯一标识符,通常为 “.” 表示未知或不适用。REF: 参考基因的碱基。ALT: 变异的碱基,可能是一个单一的碱基、多个碱基(例如插入或删除)、或者用 <*> 表示未知。QUAL: 变异的质量得分。FILTER: 变异是否通过过滤器,通常为 “.” 表示未经过滤。INFO: 包含更多关于变异的信息,如 END=977 表示变异的结束位置。FORMAT: 描述了样本基因型信息的格式。Sample1: 实际样本的基因型信息,如 “0/0:1:0:0,0,0” 表示该样本为纯合子(两个相同的等位基因),具体基因型信息依赖于 FORMAT 中的描述。
在示例中,可以看到有两个样本(Sample1 和 ./.),每个样本有对应的基因型信息。纯合子通常表示为 “0/0”,而缺失数据通常表示为 “./.”。
要查看 VCF 文件,可以使用文本编辑器或者专用的 VCF 查看工具。如果使用文本编辑器,每一行的不同字段通过制表符或空格分隔。
在线数据库
本地数据库 套用的数据库在本节介绍安装配置方法,其他专业的数据库会对应章节介绍。
NCBI 截至2023年8月8日,最新版本是V5,需要修改下方代码。
nt 下载NSBI官方构建好索引的数据库,使用ascp加速下载,下载完成直接解压就能用。
1
2
3
mkcd ~/database/ ncbi.nt/.aspera/ connect/bin/ ascp -i ~/mambaforge/ envs/tools4bioinf/ etc/asperaweb_id_dsa.openssh --overwrite=diff -QTr -l6000m \ /db/ v4/nt_v4.{00..85}.tar.gz ./
nr 下载NSBI官方构建好索引的数据库,使用ascp加速下载,下载完成直接解压就能用。
1
2
3
mkcd ~/database/ ncbi.nr/.aspera/ connect/bin/ ascp -i ~/mambaforge/ envs/tools4bioinf/ etc/asperaweb_id_dsa.openssh --overwrite=diff -QTr -l6000m \ /db/ v4/nt_v4.{00..79}.tar.gz ./
taxonomy 1 2 3 mkcd ~/database/ncbi.taxonomy
CDD NCBI-CDD用于结构域检索和验证,官方网站一次只能上传4000条序列,有时候比较影响进度,下面的代码用于本地数据库构建和比对。
1 2 3 4 5 6 7 8 in Cdd.pn -out ../db/ncbi.cdd -dbtype rps
示意图绘制 Generic Diagramming Platform
生物序列展示 Illustrator for Biological Sequences
Linux基础 命令行界面配置 有个好看的界面,在报错的时候心情会好一些:
zsh配置文件.zshrc配置细节(uername改成自己的用户名):
1 2 3 4 5 6 7 8 9 10 11 12 13 14 15 16 17 18 19 20 21 22 23 24 25 26 27 28 29 30 31 32 33 34 35 36 37 38 39 40 41 42 43 44 45 46 47 48 49 50 51 52 53 54 55 56 57 58 59 60 61 62 63 64 65 66 67 68 69 70 71 72 73 74 75 76 77 78 79 80 81 82 83 84 85 if [[ -r "${XDG_CACHE_HOME:-$HOME /.cache} /p10k-instant-prompt-${(%):-%n} .zsh" ]]; then source "${XDG_CACHE_HOME:-$HOME /.cache} /p10k-instant-prompt-${(%):-%n} .zsh" fi export ZSH="/home/username/.oh-my-zsh" precmd echo -n "\x1b]1337;CurrentDir=$(pwd) \x07" }source $ZSH /oh-my-zsh.shsource ~/.p10k.zsh"$('/home/username/mambaforge/bin/conda' 'shell.zsh' 'hook' 2> /dev/null) " if [ $? -eq 0 ]; then eval "$__conda_setup " else if [ -f "/home/username/mambaforge/etc/profile.d/conda.sh" ]; then "/home/username/mambaforge/etc/profile.d/conda.sh" else export PATH="/home/username/mambaforge/bin:$PATH " fi fi unset __conda_setupif [ -f "/home/username/mambaforge/etc/profile.d/mamba.sh" ]; then "/home/username/mambaforge/etc/profile.d/mamba.sh" fi $LD_LIBRARY_PATH :/home/username/mambaforge/libexport LD_LIBRARY_PATHexport PATH=$PATH :/home/username/software/mira/binalias np='nohup' alias tt='tail' alias np='nohup' alias pp='_pp(){ps -aux | grep $1};_pp' alias rf='rm -rf' alias mm='mamba' alias mma='mamba activate' alias mmd='mamba deactivate' alias mml='mamba env list' alias hg='_hg(){history | grep $1 | tail -n $2};_hg' alias hh='htop' alias mmt='mamba activate tools4bioinf' alias pp='python' alias hh='head' alias get='axel -n 30' alias gh='_gh(){grep ">" $1 | head};_gh' alias pp='scp -r ubuntu@43.153.77.165:/home/ubuntu/download/\* ./' alias ss="sed -i -e 's/ //g' -e 's/dna:.\{1,1000\}//g' *.fa" alias getaws="aws s3 cp --no-sign-request" alias lw="ll | wc -l" alias mmi="mamba install --freeze-installed" alias mmb="mamba install --freeze-installed -c bioconda " eval "$(starship init zsh) "
starship.toml配置文件:
1 2 3 4 5 6 7 8 9 10 11 12 13 14 15 16 17 18 19 20 21 22 23 24 25 26 27 28 29 30 31 32 33 34 35 36 37 38 39 40 41 42 43 44 45 46 47 48 49 50 51 52 53 54 55 56 57 58 59 60 61 62 63 64 65 66 67 68 69 70 71 72 73 74 75 76 77 78 79 80 81 82 83 84 85 86 87 88 89 90 91 92 93 94 95 "$schema " = 'https://www.web4xiang.com/blog/article/starship/config-schema.json' true "" "$time $all " "" "[👉👉👉➡️ ](white)" "[👉👉👉➡️ ](red)" "🌱 " "" "[](fg:#ffffff bg:none)[ 🌱 ](fg:#282c34 bg:#ffffff)[](fg:#ffffff bg:#24c90a)[ $branch ]($style )[](fg:#24c90a bg:none) " "fg:#ffffff bg:#24c90a" "🔖 " "[\\($hash \\)]($style ) [\\($tag \\)]($style )" "green" "[](fg:#ffffff bg:none)[ 🥶 ](fg:#282c34 bg:#ffffff)[ ](fg:#ffffff bg:#4da0ff)[$modified ](fg:#282c34 bg:#4da0ff)[$untracked ](fg:#282c34 bg:#4da0ff)[$staged ](fg:#282c34 bg:#4da0ff)[$renamed ](fg:#282c34 bg:#4da0ff)[](fg:#4da0ff bg:none)" "" "🏎💨" "😰" "😵" "🥰" "🤷" "📦" "📝" "👅" "🗑️" "red" false "[](fg:#ffffff bg:none)[ 📚 ](fg:#282c34 bg:#ffffff)[](fg:#ffffff bg:#00b76d)[ $path ]($style )[](fg:#00b76d bg:none) " "fg:#ffffff bg:#00b76d" false "" "🤖 " true "📦 " true "🐍 " "🦀 " "🐳 " jobs ]"🎯 " false "[](fg:#ffffff bg:none)[🐼🐻 ](fg:#282c34 bg:#ffffff)[](fg:#ffffff bg:#772953)[ $time ]($style )[](fg:#772953 bg:none)" "%T" "fg:#ffffff bg:#772953"
一些有用的命令
kill掉某个程序产生的所有进程,如kill掉EDTA产生的所有进程:
1 ps -ef | grep 'EDTA' | grep -v grep | awk '{print $2}' | xargs -r kill -9
R语言 软件安装 基础 PCoA1 2 3 4 5 6 7 8 9 10 11 12 13 14 15 16 17 18 19 20 21 22 23 24 25 26 27 28 29 30 31 32 33 34 35 36 37 38 39 40 :: read_table( "./data/sanqimetagenome/data/all.kraken2.rrarefied.counts.txt" ) %>% :: select( contains( "SRR" ) ) %>% ( ) %>% ( ) %>% :: vegdist( method = "bray" ) %>% :: pcoa( ) -> pcoa.res$ values %>% ( ) -> pcoa.weight$ vectors %>% ( ) %>% :: select( 1 : 5 ) %>% :: set_names( paste0( "PCoa" , 1 : ncol( .) ) ) %>% :: rownames_to_column( var = "Run" ) %>% :: left_join( df.sample.info) -> df.pcoa.point%>% ( aes( PCoa1, PCoa2, color = Type, shape = Part) ) + ( yintercept = 0 , color = "#222222" , = "dashed" , linewidth = 0.5 ) + ( xintercept = 0 , color = "#222222" , = "dashed" , linewidth = 0.51 ) + ( size = 5 ) + ( x = "PCoA1 (21.64%)" , y = "PCoA2 (8.36%)" ) + ( limit = c ( - 0.6 , 0.2 ) ) + ( limit = c ( - 0.2 , 0.2 ) ) + ( ) + :: mytheme( ) + ( = element_blank( ) , = element_blank( ) , = element_blank( ) , = element_blank( ) , = c ( 0.2 , 0.8 ) ) -> p.pcoa
PERMANOVA1 2 3 4 5 6 7 8 9 :: adonis2( df.peranova.table ~ Type* Part, = df.sample.info, = 999 , = "bray" ) %>% ( ) %>% :: rownames_to_column( var = "Index" ) %>% :: write_xlsx( "./data/sanqimetagenome/results/PERMANOVA.res.xlsx" )
资源
绘图 热图
1 2 3 4 5 6 7 8 9 10 ann_colors = list ( = c ( Cropland = ggsci:: pal_npg( ) ( 2 ) [ 1 ] , = ggsci:: pal_npg( ) ( 2 ) [ 2 ] ) , = c ( Cropland = ggsci:: pal_npg( ) ( 2 ) [ 1 ] , = ggsci:: pal_npg( ) ( 2 ) [ 2 ] ) , = c ( metaWRAP = ggsci:: pal_npg( ) ( 6 ) [ 3 ] , = ggsci:: pal_npg( ) ( 6 ) [ 4 ] , = ggsci:: pal_npg( ) ( 6 ) [ 5 ] , = ggsci:: pal_npg( ) ( 6 ) [ 6 ] ) )
R包开发 参考资料 https://r-pkgs.org/
创建项目 直接在 GitHub 上创建项目,然后Pull到本地即可。
使用下方的代码创建一些用得上的文件等:
1 2 3 4 5 6 7 8 9 10 11 12 13 14 15 16 17 18 19 20 21 22 23 24 25 26 27 28 29 30 31 32 33 34 35 36 37 38 39 40 41 42 43 44 45 46 47 48 49 50 51 52 53 54 55 56 57 58 59 60 61 62 63 64 65 66 67 68 69 70 71 72 73 74 75 76 77 :: available( "biohelpers" ) :: use_mit_license( ) :: use_citation( ) ( "deve.log.R" ) :: use_github_links( ) :: use_build_ignore( "README.md" ) :: use_build_ignore( "deve.log.R" ) :: use_build_ignore( "biohelpers.Rproj" ) :: use_build_ignore( "R/process_data.R" ) ( "R/biohelpers-global.R" ) :: use_version( "major" ) :: use_version( "minor" ) :: use_version( "patch" ) :: use_version( "dev" ) :: use_import_from( "dplyr" , "%>%" ) :: use_import_from( "dplyr" , "arrange" ) :: use_import_from( "dplyr" , "mutate" ) :: use_import_from( "dplyr" , "select" ) :: use_import_from( "dplyr" , "left_join" ) :: use_import_from( "FactoMineR" , "PCA" ) :: use_import_from( "factoextra" , "get_eigenvalue" ) :: use_import_from( "tibble" , "rownames_to_column" ) :: use_import_from( "ggplot2" , "ggplot" ) :: use_import_from( "ggplot2" , "aes" ) :: use_import_from( "ggplot2" , "geom_vline" ) :: use_import_from( "ggplot2" , "geom_hline" ) :: use_import_from( "ggplot2" , "geom_point" ) :: use_import_from( "ggplot2" , "labs" ) :: use_import_from( "magrittr" , "set_names" ) :: use_import_from( "stringr" , "str_replace" ) :: style_file( "R/pca_in_one.R" ) :: build_vignettes( ) :: load_all( ) :: document( ) :: use_tidy_description( ) :: check( ) :: build( ) :: check_built( "../biohelpers_0.0.0.4.tar.gz" ) ( "../biohelpers_0.0.0.4.tar.gz" , "./" ) :: use_github_release( publish = TRUE ) :: build_site( new_process = FALSE ) :: use_pkgdown_github_pages( )
开发完每个函数都需要 check 一次,免得 bug 太多,debug 到爆炸。
易出错点
不能 import 或者是 importFrom base,不然会报错:operation not allowed on base namespace
example 中用到的 R 包也要在 import 中进行声明
用不到的 .R 问价统统忽略,不然会报错:
1 2 Non- standard file/ directory found at top level: 'test_function.R'
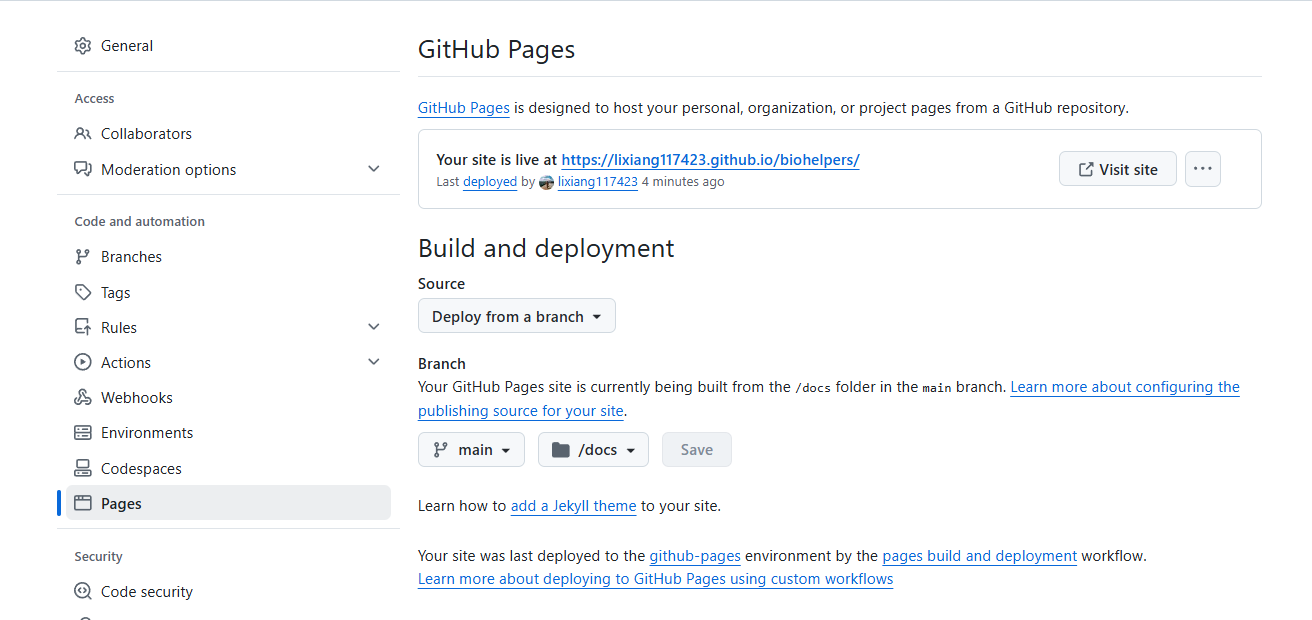
GitHub Pages 设置 首先在.gitignore 这个文件中将/docs 这个文件夹删除,这样才能推送上去形成页面。
推送有延迟,要等几个小时,也尽量不要频繁推送更新。
Python 基因组 三代基因组组装(Hi-Fi) 软件安装 1 2 3 mamba install -c bioconda hifiasm
hifiasm组装 1 nohup hifiasm -o 01.hifiasm/101 -t60 -l0 data/fq/101.fq > hifiasm.log 2>&1 &
结果文件:
1 2 3 4 5 6 7 8 9 10 11 12 13 14 15 16 17 18 -rw-rw-r-- 1 lixiang lixiang 164M 10月 23 16:18 101.bp.a_ctg.gfa
其中`p_ctg.gfa是主要的contigs.
将组装得到的结果转换为fasta格式:
1 gfatools gfa2fa 01.hifiasm/101.bp.p_ctg.gfa > 01.hifiasm/process/101.primary.assembly.fa
挂载到染色体得到伪染色体:
1 ragtag.py scaffold -t 60 ~/project/yyt.3rd.acuce/02.r498/01.r498.genome/R498.genome 01.hifiasm/process/101.primary.assembly.fa -o 01.hifiasm/process/101.rag.tag
提取染色体序列:
1 seqkit grep -f chr.id.txt 01.hifiasm/process/101.rag.tag/ragtag.scaffold.fasta > 01.hifiasm/final/101.HiFiasm.fa
BUSCO验证组装结果:
1 busco -i 01.hifiasm/final/101.HiFiasm.fa -l ~/lixiang/database/busco.plant/embryophyta_odb10 --cpu 75 -f --offline -m genome -o 01.hifiasm/busco/101
1 2 3 4 5 6 7 8 9 10 11 ---------------------------------------------------groups searched |
pbsv鉴定结构变异 1 2 sort -J 60 03.mapping/01.index/r498.mmi data/raw/101/r84071_230824_001/A01/m84071_230824_103359_s1.hifi_reads.bc2027.bam -j 60 03.mapping/02.bam/101.bam
1 2 pbsv discover 03 .mapping/02 .bam/101 .bam 05 .pbsv/101 .svsig.gz
1 2
1 2
sniffles2结构变异 这个软件的速度非常快。参考文献:
Sedlazeck F J, Rescheneder P, Smolka M, et al. Accurate detection of complex structural variations using single-molecule sequencing[J]. Nature methods, 2018, 15(6): 461-468.
1 2 sniffles -t 60 --input 03.mapping/02.bam/1.bam --snf 08.sniffles/1.snf
下一步是利用SV推断群体结构,这里选择不过滤位点信息,如果是后续做GWAS的话再过来位点。
将vcf文件转为bed文件:
1 2 vcftools --vcf 08.sniffles/all.sniffles.vcf --plink --out 08.sniffles/all.sniffles.for.plink.pca.vcf
输出的文件有这些:
1 2 3 4 5 6 7 8 9 all.sniffles.for.plink.pca.vcf.final.bed
计算PCA:
1 plink --threads 60 --bfile 08.sniffles/all.sniffles.for.plink.pca.vcf.final --pca 3 --out 08.sniffles/all.sniffles.plink.pca.res
输出的文件:
1 2 3 4 -rw-rw-r-- 1 lixiang lixiang 24 10月 29 13:04 08.sniffles/all.sniffles.plink.pca.res.eigenval
GFF文件注释VCF文件 使用的是vcfanno ,参考文献:
Pedersen B S, Layer R M, Quinlan A R. Vcfanno: fast, flexible annotation of genetic variants[J]. Genome biology, 2016, 17(1): 1-9.
先对GFF文件进行处理。
1 2 3 sort -k1,1 -k4,4n r498.gff > r498.sorted.gff
两个配置文件:
gff_sv.lua:
1 2 3 4 5 6 7 8 9 10 11 12 13 14 15 16 17 18 19 20 21 22 23 24 25 26 27 function gff_to_gene_name(infos, name_field)if infos == nil or return nillocal result = {}for i=1,local s, e = string.find(info, name_field .. "=" )if s ~= nil then ";" )if e == nil then else local keys = {}for k, v in pairs(result) do return table.concat(keys,"," )
gff_sv.conf:
1 2 3 4 5 [[annotation]]"r498.sorted.gff.gz" "gene" ]"lua:gff_to_gene_name(vals, 'gene_name')" ]
运行:
1 vcfanno -p 60 -lua gff_sv.lua gff_sv.conf all.sniffles.vcf > all.sniffles.vcfanno.vcf
DNA甲基化 由于PacBio HiFi 的数据能够直接对DNA甲基化进行鉴定,因此加一步DNA甲基化:
1 ~/software/pb-CpG-tools-v2.3.2/bin/aligned_bam_to_cpg_scores --bam 03.mapping/02.bam/101.bam --output-prefix ./04.CpG.methylation/101 --model ~/software/pb-CpG-tools-v2.3.2/models/pileup_calling_model.v1.tflite --threads 60
重复序列注释 使用EDTA对重复序列进行注释,参考文献:
Benchmarking transposable element annotation methods for creation of a streamlined, comprehensive pipeline : 1-18.)
软件安装 我直接用conda安装的时候失败了,选择按照官网建议的方式安装:
1 2 git clone https://github.com/oushujun/EDTA.gitenv create -f EDTA.yml
测试是否安装成功:
1 2 cd ./EDTA/test
输入文件 基因组文件是必须的,其他可选的文件有:
编码序列:可以是这个物种的,也可以是近缘种的;
基因组上基因的起始和终止位置;
精准的物种TE库,如果没有就最好不要加进去。
运行示例 1 EDTA.pl --species Rice --genome ../02.hifiasm/final/1.HiFiasm.fa --cds ../01.data/ref/r498.cds.fa --curatedlib ../01.data/ref/r498.te.bed --overwrite 1 --sensitive 1 --evaluate 1 --threads 60
Augustus基因注释 1 augustus --species=rice --protein=on --codingseq=on --introns=on --start=on --stop=on --cds=on --exonnames=on --gff3=on 02.hifiasm/final/1.HiFiasm.fa > 14.augustus/1.augustus.gff3
DeepVariant鉴定变异 安装 直接使用docker安装:
1 docker pull google/deepvariant:1.6.0
数据准备 需要bam文件和基因组文件。bam问价可以使用minimap比对得到,需要使用samtools构建索引,生成.bai文件;基因组文件需要使用samtools faidx构建索引。
开始运行 我尝试使用基因组间的比对结果进行变异检测,但是失败了,换成原始数据比对得到的bam文件就可以了:
1 2 3 4 5 6 7 8 9 10 11 12 13 docker run \"/home/lixiang/lixiang/yyt.acuce.3rd/03.mapping/02.bam/" :"/input" \"/home/lixiang/lixiang/yyt.acuce.3rd/19.deepvariant/" :"/output" \false \
一行代码:
1 docker run -v "/home/lixiang/lixiang/yyt.acuce.3rd/03.mapping/02.bam/" :"/input" -v "/home/lixiang/lixiang/yyt.acuce.3rd/19.deepvariant/" :"/output" google/deepvariant:1.6.0 /opt/deepvariant/bin/run_deepvariant --model_type=WGS --ref=/input/r498.chr1-ch12.fa --reads=/input/99.bam --output_vcf=/output/vcf/99.vcf.gz --output_gvcf=/output/gvcf/99.gvcf.gz --num_shards=50 --logging_dir=/output/log/logs --dry_run=false --sample_name 99
变异数量统计 用bedtools统计染色体不同区域上变异的覆盖度。
1 2 3 4 5 6 7 8
SyRi鉴定结构变异 对结构变异进行注释:
1 awk '$4 !="-"' ../15.syri/02.sryi/1.HiFiasm.syrisyri.out | cut -f 1-3,9 | > ./1.HiFiasm.syrisyri.bed
1 2 3 4 5 6 7 8 9 10 11
1 awk '$3 =="gene"' r498.gff | awk {'print $1 ,$4 , $5 , $9 ' } | awk '{split($4 , arr, ";"); print $1 , $2 , $3 , arr[1]}' | sed 's/ /\t/g' | sed 's/ID=//g' > r498.gene.bed
1 2 3 4 5 6 7 8 9 10 11
1 bedtools intersect -a 1.HiFiasm.syrisyri.bed -b r498.gene.bed -loj -wo > 1.HiFiasm.syrisyri.sv.gene.txt
没有和基因位置有交集的会用占位符占位:
1 2 3 4 5 6 7 8 9 10 11 Chr1 466785 466785 SNP4173 . -1 -1 .
如果只想要注释到基因上的变异位点,使用:
1 bedtools intersect -a 1.HiFiasm.syrisyri.bed -b r498.gene.bed -wa -wb > 1.HiFiasm.syrisyri.sv.gene.txt
输出的结果就全是注释到基因的变异位点:
1 2 3 4 5 6 7 8 9 10 Chr1 32047 32047 SNP3883 Chr1 24850 34201 OsR498G0100001100.01
VCF文件建树 大概可以分为过滤、计算距离、建树等三步。
1 bcftools filter -i 'QUAL>=20' all.deepvariant.vcf.gz -O z -o all.deepvariant.filtered.vcf.gz
1 bcftools view -v snps all.deepvariant.filtered.vcf.gz -Oz -o all.deepvariant.filtered.snp.vcf.gz
1 plink --vcf all.deepvariant.filtered.cnp.vcf.gz --geno 0.1 --maf 0.05 --out all.deepvariant.filtered.snp.plink --recode vcf-iid --allow-extra-chr --set-missing-var-ids @:
1 python3 ~/software/vcf2phylip-2.8/vcf2phylip.py -i all.deepvariant.filtered.snp.plink.vcf
IQ-tree建树:-m MFP表示查找最佳模型,-b表示Bootstrap 迭代次数。为了节省时间,看个大概,可以使用-m TEST。
1 iqtree --mem 80% -T 60 -m MFP -b 1000 -s all.deepvariant.filtered.snp.plink.min4.phy
-m MFP:ModelFinder will test up to 1232 protein models (sample size: 168525) …
-m TEST:ModelFinder will test up to 224 protein models (sample size: 168525) …
运行完成会输出最佳模型:
Best-fit model: PMB+F+I+G4 chosen according to BIC.
1 ~/software/VCF2Dis-1.50/bin/VCF2Dis -i all.deepvariant.filtered.snp.vcf.gz -o all.deepvariant.filtered.snp.mat
1 2 3 4 5 6 7 8 ````'QUAL>=20' all.deepvariant.vcf.gz -O z -o all.deepvariant.filtered.vcf.gz
1 bcftools view -v snps all.deepvariant.filtered.vcf.gz -Oz -o all.deepvariant.filtered.snp.vcf.gz
1 plink --vcf all.deepvariant.filtered.cnp.vcf.gz --geno 0.1 --maf 0.05 --out all.deepvariant.filtered.snp.plink --recode vcf-iid --allow-extra-chr --set-missing-var-ids @:
1 2 vcftools --vcf all.deepvariant.filtered.snp.plink.vcf --plink --out all.deepvariant.filtered.snp.plink.pca.data
1 plink --bfile all.deepvariant.filtered.snp.plink.pca.data.final --pca --out all.deepvariant.filtered.snp.plink.pca.result
最终的文件有这些:
1 2 3 4 5 6 7 8 9 10 11 12 13 14 15 16 -rw-rw-r-- 1 lixiang lixiang 308 11月 14 19:54 all.deepvariant.filtered.snp.plink.nosex
用all.deepvariant.filtered.snp.plink.pca.result.eigenval和all.deepvariant.filtered.snp.plink.pca.result.eigenvec这两个文件就可以画图了。
ANNOVAR注释变异
gff3文件转GenPred文件(PS:GFF3文件需要有表头,加上##gff-version 3即可。)
1 gff3ToGenePred KY131.IGDBv1.Allset.gff KY131_refGene.txt
1 perl ~/software/annovar/retrieve_seq_from_fasta.pl --format refGene --seqfile KY131.genome KY131_refGene.txt -outfile KY131_refGeneMrna.fa
1 2 bcftools filter -i 'QUAL>=20' 07.gatk/s-1-2_H7GYJCCXY_L1.RGA5.gvcf -O z -o 07.gatk/s-1-2_H7GYJCCXY_L1.RGA5.gvcf.filtered.gz
1 perl ~/software/annovar/annotate_variation.pl --geneanno -dbtype refGene --buildver KY131 07.gatk/s-1-2_H7GYJCCXY_L1.RGA5.annovar.vcf 01.data/ANNOVAR -out 10.annovar/s-1-2_H7GYJCCXY_L1.RGA5
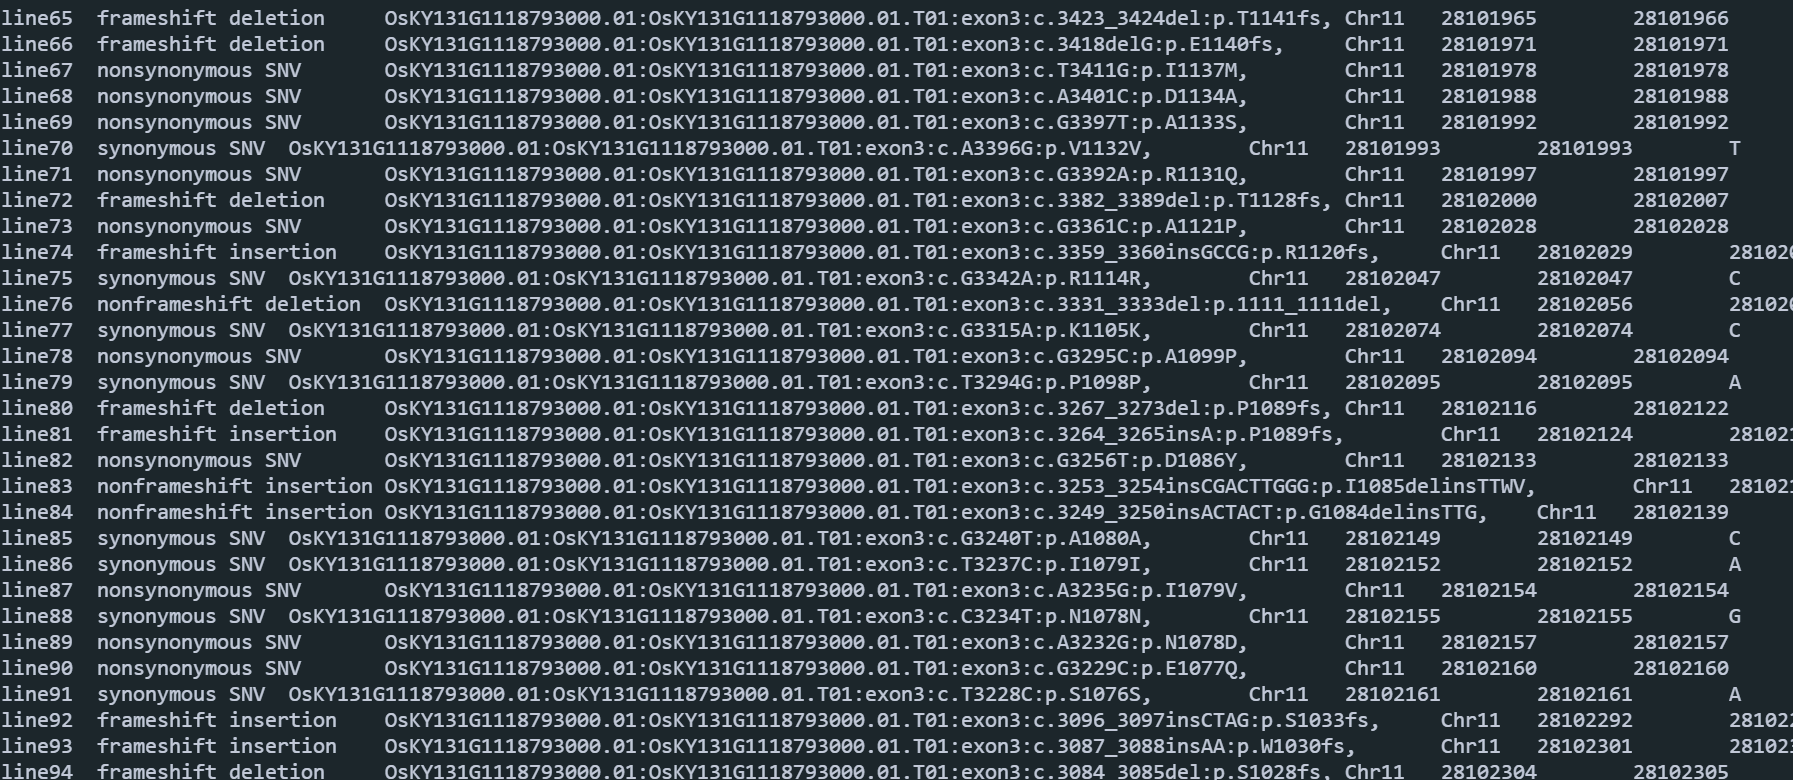
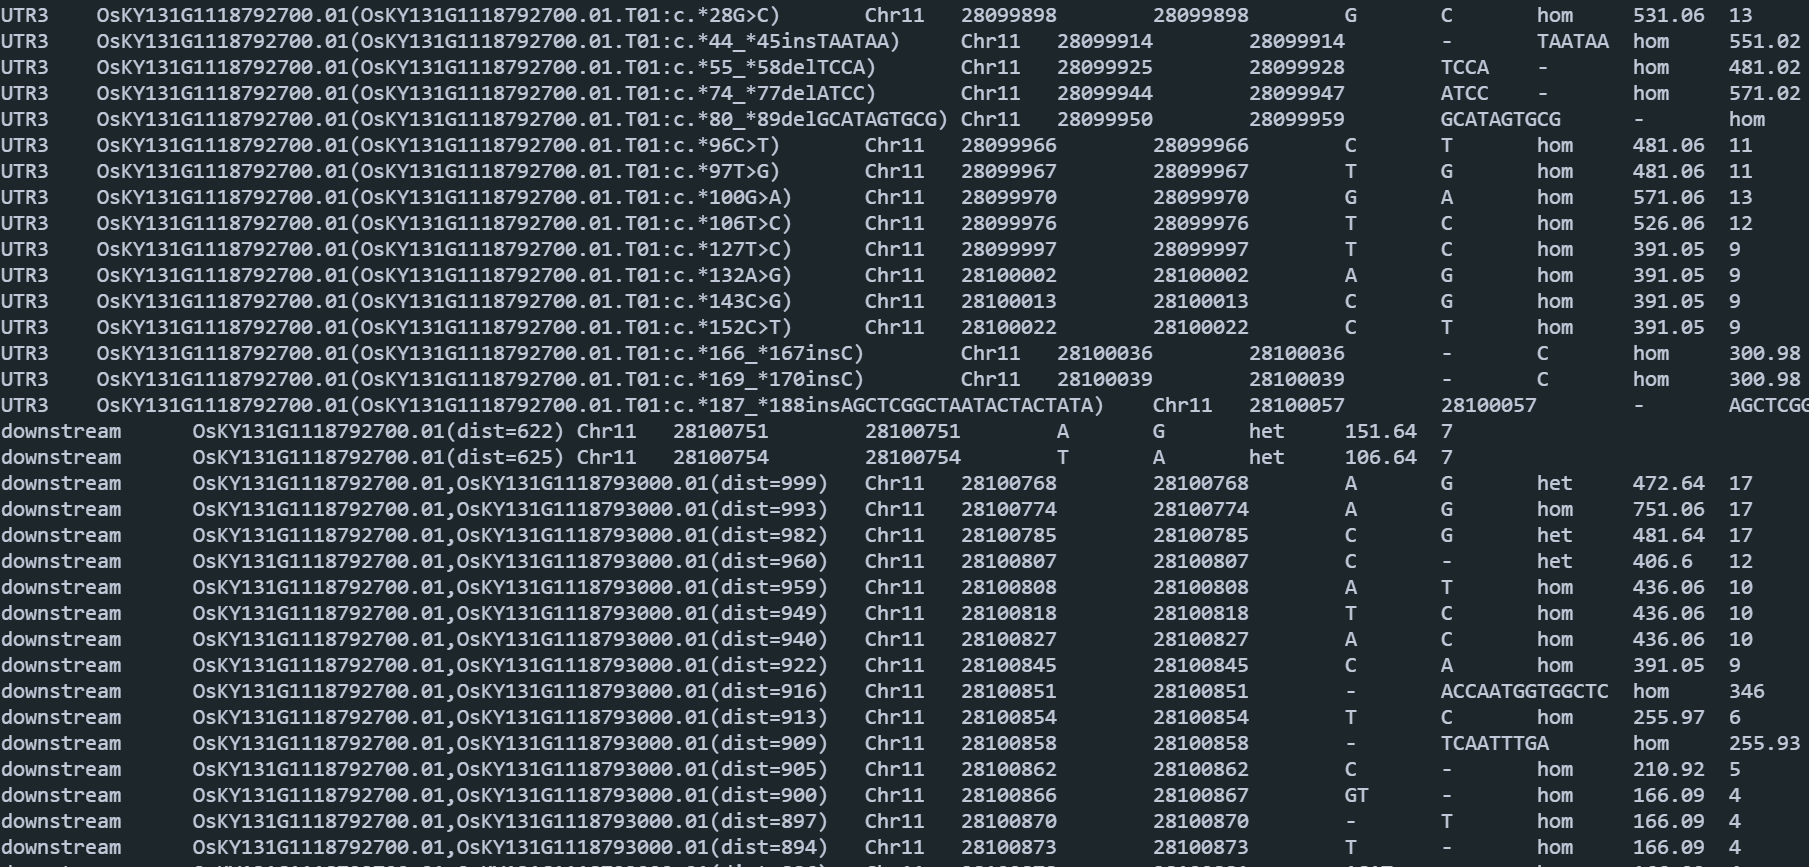
输出结果:每个文件会输出三个文件
1 2 3 -rw-rw-r-- 1 lixiang lixiang 36K 11月 24 15:39 s-101_H7YKKCCXY_L1.PIK1.exonic_variant_functionlog
s-101_H7YKKCCXY_L1.PIK1.exonic_variant_function:变异信息,是同义突变还是非同义突变,以及突变前后的序列差异。
s-101_H7YKKCCXY_L1.PIK1.variant_function:突变发生的位置在那个区域。
转录组 可变剪切分析 参考文献
Shen S, Park J W, Lu Z, et al. rMATS: robust and flexible detection of differential alternative splicing from replicate RNA-Seq data[J]. Proceedings of the National Academy of Sciences
软件安装 1 mamba install -c bioconda rmats
构建索引 1 STAR --runMode genomeGenerate --genomeDir 01.genome.data/star.index --genomeFastaFiles 01.genome.data/genome.fa --sjdbGTFfile 01.genome.data/genome.gtf
泛基因组 graph-based pan-genome 如何理解基于图的泛基因组呢?可以想象成一个网络图,有节点node和边edge,节点就是没有发生变异的序列,edge呢就是发生了遗传变异的序列,将这些节点连接起来就得到path.
Minigraph-Cactus 这个流程发表在NBT上(Pangenome graph construction from genome alignments with Minigraph-Cactus ),人类泛基因组文章用的就是这个流程。
软件安装 软甲地址是https://github.com/ComparativeGenomicsToolkit/cactus . 自己编译,但是我编译好几次都没有泛基因组这个流程,索性用Docker直接部署。
1 docker pull quay.io/comparative-genomics-toolkit/cactus:v2.7.0
软件使用
样品文件准备:准备一个txt文件,以\t分隔,第一列是样品名称,第二列是样品所在的路径:
1 2 3 4 5 6 7 8 9 10 100 ./genome/100.HiFiasm.fa
进入镜像:需要指定宿主机的工作目录,也就是文件存放的位置,如我的工作路径在~/lixiang/yyt.acuce.3rd/25.pangenome:
1 docker run -itd --name cactus-pan -v ~/lixiang/yyt.acuce.3rd/25.pangenome:/data quay.io/comparative-genomics-toolkit/cactus:v2.7.0
开始运行:100个水稻的基因组差不多24小时就能运行完了,速度还是很快的:
1 nohup docker exec cactus-pan cactus-pangenome ./jb sample.txt --outDir ./cactus-pangenome.r498 --outName Acuce --reference R498 --vcf --giraffe --gfa --gbz --odgi --xg --viz --draw --chrom-vg --chrom-og --maxMemory 400G --logFile run.log
输出文件:输出文件包含了最常见的gfa格式的graph文件,vcf文件存放变异信息,chrom-subproblems文件夹包含了每条染色体的graph。
1 2 3 4 5 6 7 8 9 10 11 12 13 14 15 16 17 18 19 20 21 22 23 24 25 26 总计 38G
比较基因组 软件安装 使用mamba安装软件:
1 2 3 4 5 6 7 8 9 10 11 12 13 14 15 16 17 18 19 20 21 22 23 24 mamba create --name comparative.genomics
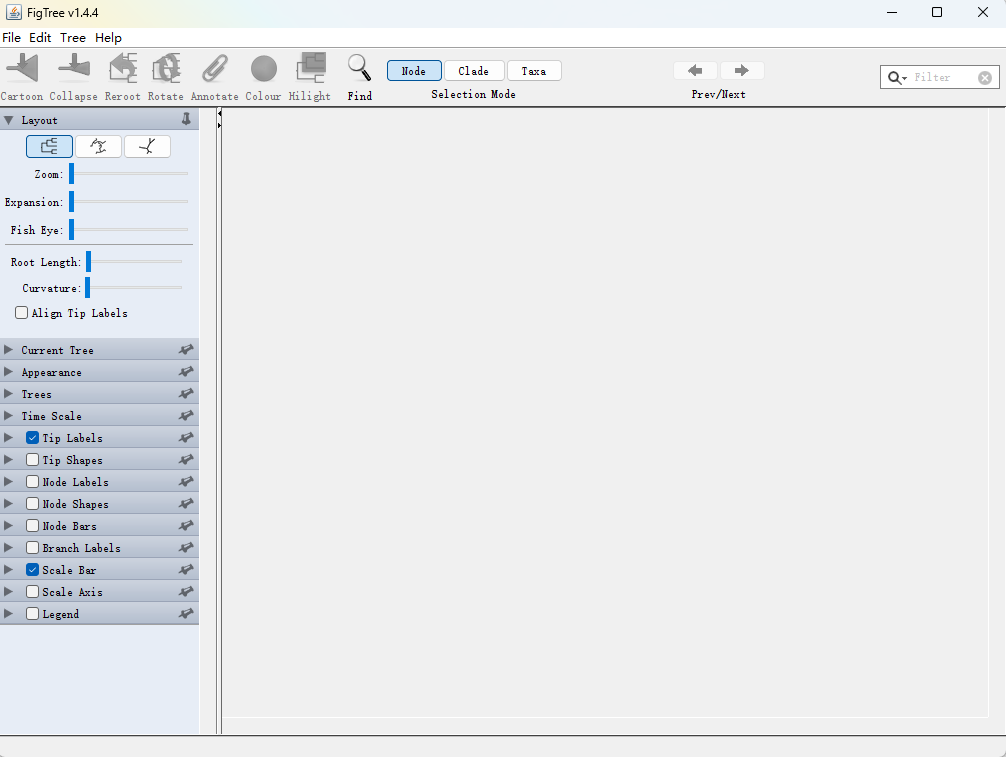
需要手动安装FigTree,主要功能是将系统发育树设置为有根树。
官方地址:https://github.com/rambaut/figtree/releases/tag/v1.4.4 .
点击下载Windows版本 ,解压后双击打开即可。
数据下载处理 从Rice Resource Center 下载非洲栽培稻CG14、籼稻代表性品种IR64、R498和我们国内水稻研究领域常用的ZH11用于本次分析。最终得到如下的文件:
1 2 3 4 5 6 -rw-r--r-- 1 lixiang lixiang 338M 12月 19 2019 CG14.fa
一个比较重要的点:基因组中染色体的编号和gff文件中的必须一致!!! 如:
1 2 3 4 5 6 7 8 9 10 11 >grep ">" CG14.fa| head
1 2 3 4 5 6 7 8 9 10 11 >head CG14.gff3
下一步是准备CDS文件和蛋白序列文件。使用这两个脚本:get_cds_pep_from_gff_and_genome.pl 、get_longest_pepV2.pl 和accordingIDgetGFF.pl
使用方法为:
1 2 3 4 perl ./01.scripts/get_cds_pep_from_gff_and_genome.pl -gff ./02.data/CG14.gff3 -genome ./02.data/CG14.fa -index CG14 -od ./03.cds.pep/CG14od ./03.cds.pep/ZH11od ./03.cds.pep/IR64od ./03.cds.pep/R498
运行完成就可以得到下面的结果:
1 2 3 4 5 6 7 >ll 03.cds.pep/CG14/Longest id
基因家族推断 使用OrthoFinder. 需要注意的点有:
输入文件是蛋白序列,以.fa或者.fasta结尾;
不能存在可变剪切,输入每个基因最长的转录本;
多倍体必须拆成亚基因组对应的蛋白质序列去做。如陆地棉为AADD,共获得两套亚基因组A和D,所以要把该基因组所有的蛋白分成A和D这两个物种去做。
拷贝最长转录本的蛋白序列 1 2 3 4 5 mkdir 04.longest.pepcp 03.cds.pep/CG14/Longest/CG14.longest.protein.fa 04.longest.pep/CG14.fa cp 03.cds.pep/ZH11/Longest/ZH11.longest.protein.fa 04.longest.pep/ZH11.facp 03.cds.pep/IR64/Longest/IR64.longest.protein.fa 04.longest.pep/IR64.facp 03.cds.pep/R498/Longest/R498.longest.protein.fa 04.longest.pep/R498.fa
运行OrthoFinder 1 2 3 orthofinder -f 04.longest.pep -S diamond -t 50 -n 05.orthofindermkdir 05.orthofindermv 04.longest.pep/OrthoFinder/Results_05.orthofinder/* 05.orthofinder
-S表示使用什么软件进行蛋白序列比对,diamond非常快,通常用它。-t表示线程数,数字越大运行越快。
Orthofinder输出结果 运行完成会输出如下的结果:
OrthoFinder assigned 108252 genes (94.3% of total) to 31664 orthogroups. Fifty percent of all genes were in orthogroups with 3 or more genes (G50 was 3) and were contained in the largest 12883 orthogroups (O50 was 12883). There were 24518 orthogroups with all species present and 19801 of these consisted entirely of single-copy genes.
输出这些文件(主要包含共有基因家族和共有基因、各物种特有基因家族和特有基因、单拷贝基因家族和单拷贝基因和未能形成基因家族的物种特有基因):
1 2 3 4 5 6 7 8 9 10 11 12 13 14 15 -rw-rw-r-- 1 lixiang lixiang 2.5K 8月 8 16:50 Citation.txt
不同物种共有的Orthogroups 共有和特有的Orthogroups:
1 2 3 4 5 >cat 05.orthofinder/Comparative_Genomics_Statistics/Orthogroups_SpeciesOverlaps.tsv 28526 26818 26007 26818 29829 27297 26007 27297 28913
主要统计信息 1 2 3 4 5 6 7 8 9 10 11 12 13 14 15 16 17 18 19 20 21 22 23 24 25 26 27 28 29 30 31 32 33 34 35 36 37 38 39 40 41 42 43 44 45 46 47 48 49 50 51 52 53 >cat 05.orthofinder/Comparative_Genomics_Statistics/Statistics_Overall.tsv in orthogroups 108252 in orthogroups 94.3 in species-specific orthogroups 2296 in species-specific orthogroups 2.0 in orthogroup Number of orthogroups Percentage of orthogroups Number of genes Percentage of genes'1 23452 74.1 73919 68.3 ' 2 1953 6.2 12442 11.5'3 419 1.3 4015 3.7 ' 4 145 0.5 1828 1.7'5 58 0.2 913 0.8 ' 6 40 0.1 747 0.7'7 17 0.1 378 0.3 ' 8 15 0.0 375 0.3'9 13 0.0 359 0.3 ' 10 6 0.0 187 0.2'1001+ 0 0.0 0 0.0 Number of species in orthogroup Number of orthogroups 1 578 # 578个基因存在于1个物种中 2 6568 # 6568个基因存在于2个物种中 3 24518 # 24518个基因存在于3个物种中【PS:这就是泛基因组中的core gene啊】
物种统计信息 1 >cat 05.orthofinder/Comparative_Genomics_Statistics/Statistics_PerSpecies.tsv
比较指标
CG14
IR64
ZH11
Number of genes【用于计算的基因数量】
38016
39498
37325
Number of genes in orthogroups【参与聚类的基因数量】
35327
37146
35779
Number of unassigned genes【未参与聚类的基因数量】
2689
2352
1546
Percentage of genes in orthogroups【参与聚类的基因比例】
92.9
94
95.9
Percentage of unassigned genes【未参与聚类的基因比例】
7.1
6
4.1
Number of orthogroups containing species【基因家族数量】
28526
29829
28913
Percentage of orthogroups containing species【基因家族基因比例】
90.1
94.2
91.3
Number of species-specific orthogroups【特有的基因家族】
219
232
127
Number of genes in species-specific orthogroups【特有的基因数量】
756
827
713
Percentage of genes in species-specific orthogroups【特有基因的比例】
2
2.1
1.9
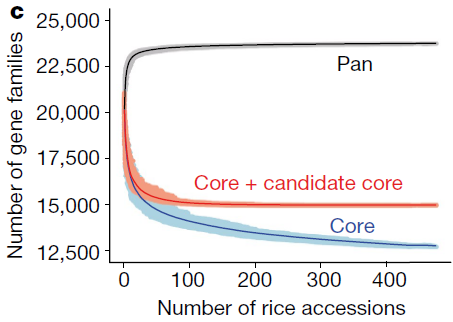
PS:用这个表基因可以做泛基因组分析中那个典型的图了。
Wang W, Mauleon R, Hu Z, et al. Genomic variation in 3,010 diverse accessions of Asian cultivated rice[J]. Nature, 2018, 557(7703): 43-49.
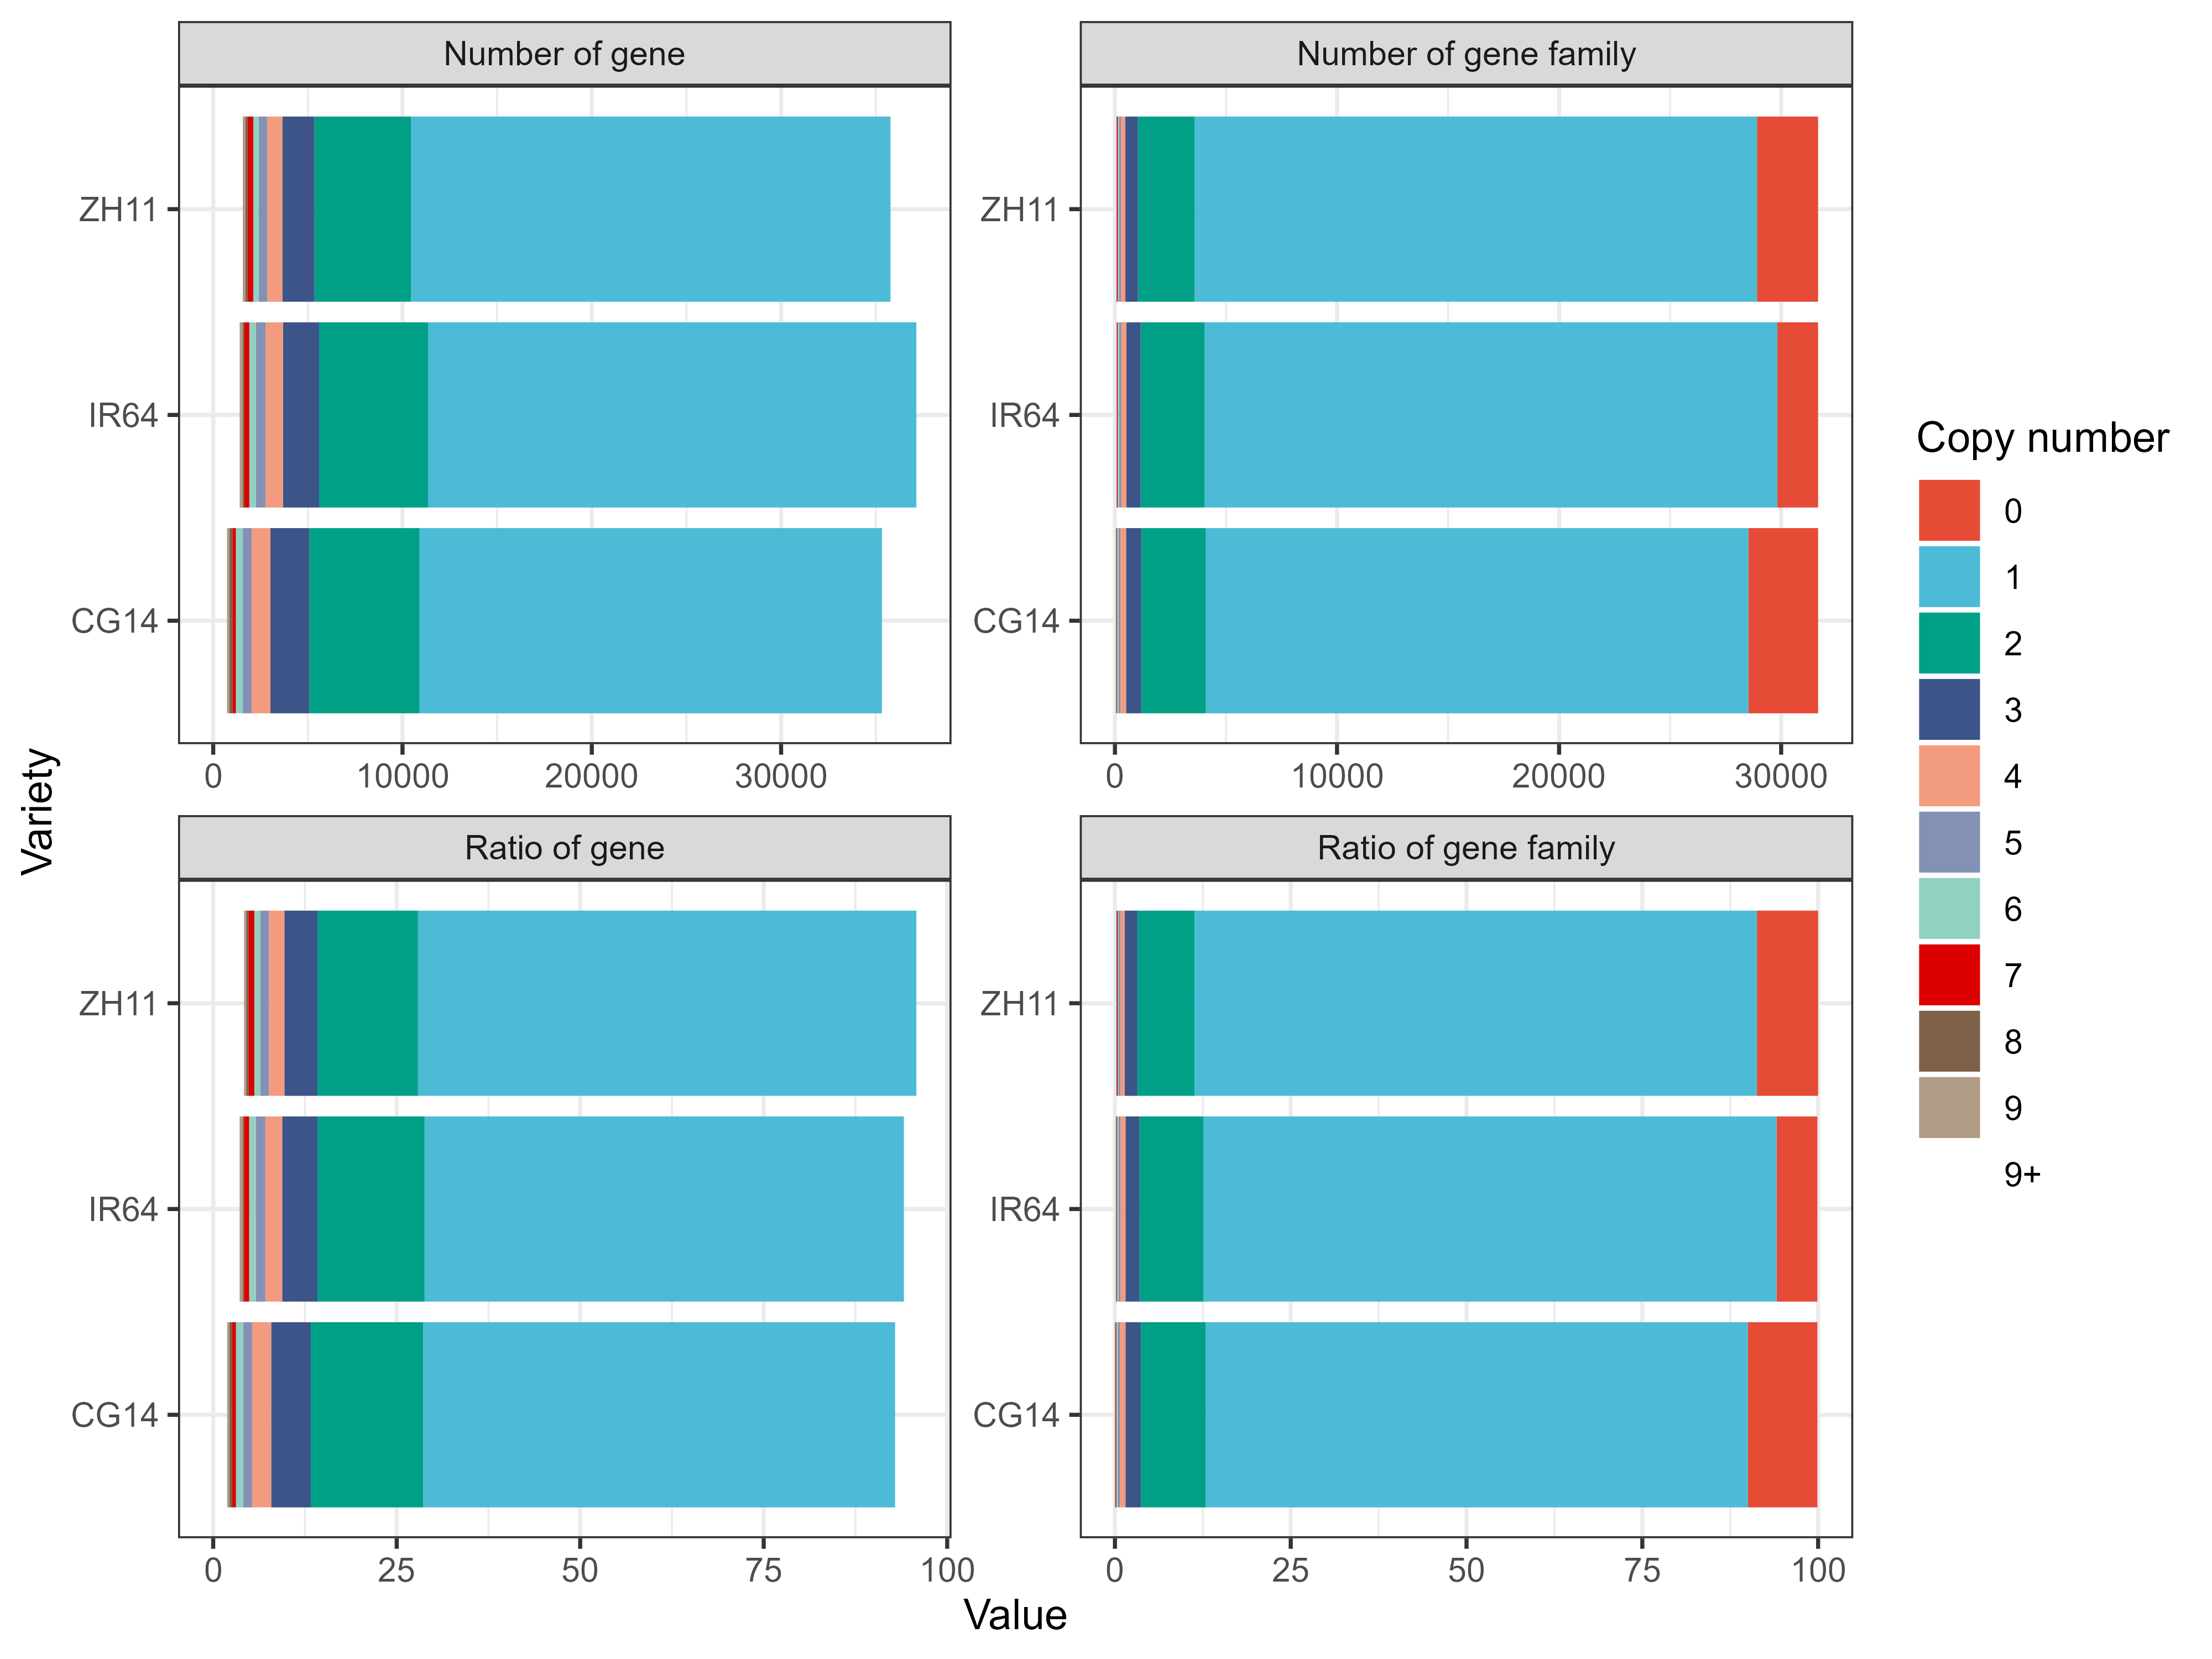
结果可视化:
点击下载示例数据
1 2 3 4 5 6 7 8 9 10 11 12 13 14 15 16 17 18 19 rm( list = ls( ) ) ( tidyverse) ( ggsci) :: read_excel( "./Statistics_PerSpecies.xlsx" ) %>% :: pivot_longer( cols = 3 : ncol( .) ) %>% :: group_by( group, name, `Copy number`) %>% :: summarise( sum = sum ( value) ) %>% :: ungroup( ) %>% ( aes( sum , name, fill = `Copy number`) ) + ( ) + ( x = "Value" , y = "Variety" ) + ( .~ group, scales = "free" ) + ( ) + ( ) ( file = "./Statistics_PerSpecies.png" , = 8 , height = 6 , dpi = 500 )
Orthogroups文件夹
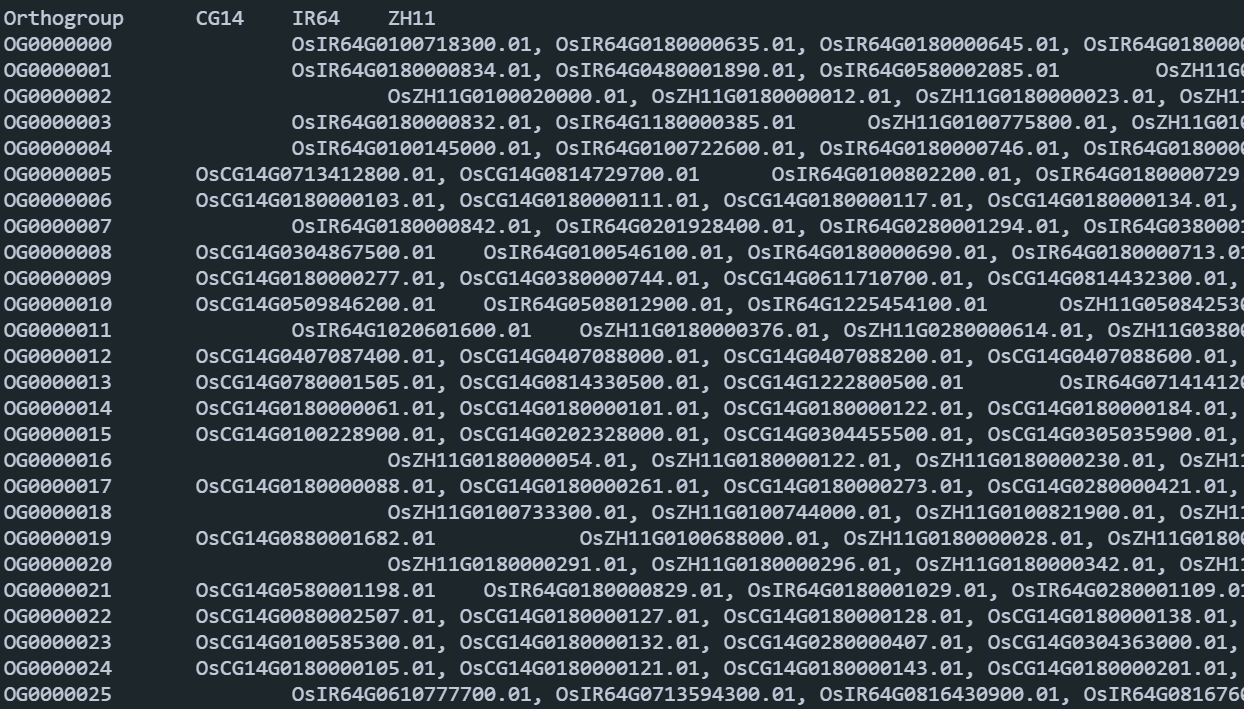
Orthogroups.tsv:每一行是一个基因家族,后面的每一列是每个基因家族在每个品种中的基因编号。
Orthogroups.txt: 类似于Orthogroups.tsv,只不过是OrthoMCL 的输出格式。Orthogroups_UnassignedGenes.tsv:物种特异性基因,没有聚类为基因家族的。
单拷贝基因序列 Single_Copy_Orthologue_Sequences这个文件夹里面的是单拷贝基因家族的序列文件。每个文件就是一个单拷贝基因家族的序列。作用:单拷贝基因用于推断物种系统发育树 。
Species_Tree 这个文件夹存放的是有根的物种树。
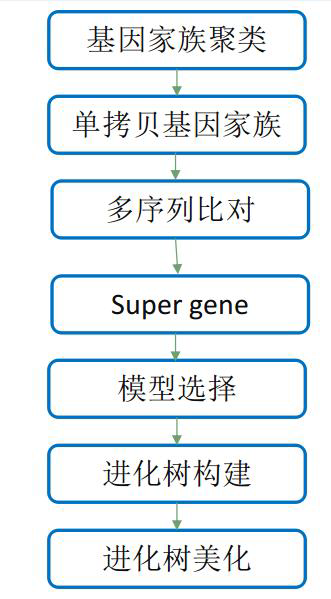
构建物种系统发育树 之前我使用的是OrthoFinder输出的物种树木,这里提供一种新的方法。
多序列比对 使用的是单拷贝基因。
1 2 3 ls 05.orthofinder/Single_Copy_Orthologue_Sequences/OG*[0-9].fa | awk '{print "mafft --localpair --maxiterate 1000 "$1" 1>"$1".mafft.fa 2>mafft.error"}' | shmkdir 06.species.treemv 05.orthofinder/Single_Copy_Orthologue_Sequences/*.mafft.fa ./06.species.tree/
合并CDS序列 先合并为一个,再按照单拷贝基因家族进行拆分。点击下载脚本 。
1 2 3 4 5 cat 03.cds.pep/*/Longest/*.longest.cds.fa > 06.species.tree/all.cds.famv 05.orthofinder/Single_Copy_Orthologue_Sequences/*.mafft.fa.cds ./06.species.tree rm 06.species.tree/all.cds.fa
蛋白序列→密码子序列 1 ls 06.species.tree/OG*[0-9].fa.mafft.fa | awk '{print "pal2nal.pl "$1" "$1".cds -output fasta > "$1".codon.fa" }' | sh
运行的过程中出现一些提示:
1 2 3 4 5 6 7 8 9 ERROR: number of input seqs differ (aa: 0; nuc: 3)!!'' 'OsCG14G0780001574.01 OsIR64G0714247300.01 OsZH11G0717076700.01' '' 'OsCG14G0713270300.01 OsIR64G0714248700.01 OsZH11G0717078300.01'
比对结果优化 1 ls 06.species.tree/OG*[0-9].fa.mafft.fa.codon.fa | awk '{print "Gblocks "$1" -t=c -b5=h"}' | sh
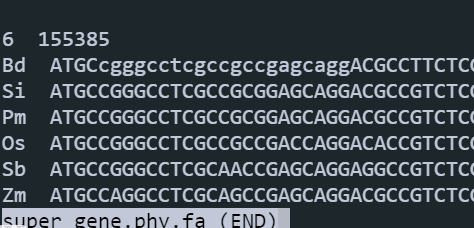
构建Super gene 需要注意物种编号:
1 cat 05.orthofinder/WorkingDirectory/SpeciesIDs.txt
1 2 3 0: CG14.fa
新建一个文件name.txt,顺序必须和上面的一致:
开始构建super gene(点击下载脚本 ):
1 perl 01.scripts/get_super_gene.pl 06.species.tree 06.species.tree/super.gene.phy.fa 06.species.tree/name.txt
IQ-TREE建树1 nohup iqtree -s 06.species.tree/super.gene.phy.fa -bb 1000 -m TEST -nt 1 -pre ./06.species.tree/IQ_TREE &
出现报错,因为少于四个。
1 2 3 4 5 All model information printed to ./06.species.tree/IQ_TREE.model.gzfor ModelFinder: 4.087 seconds (0h:0m:4s)for ModelFinder: 4.695 seconds (0h:0m:4s)for ultrafast bootstrap (seed: 351912)...
1 2 3 4 5 6 7 8 9 -rw-rw-r-- 1 lixiang lixiang 85 8月 9 10:49 06.species.tree/IQ_TREE.bionjlog
利用FigTree将Os设置为树的根。
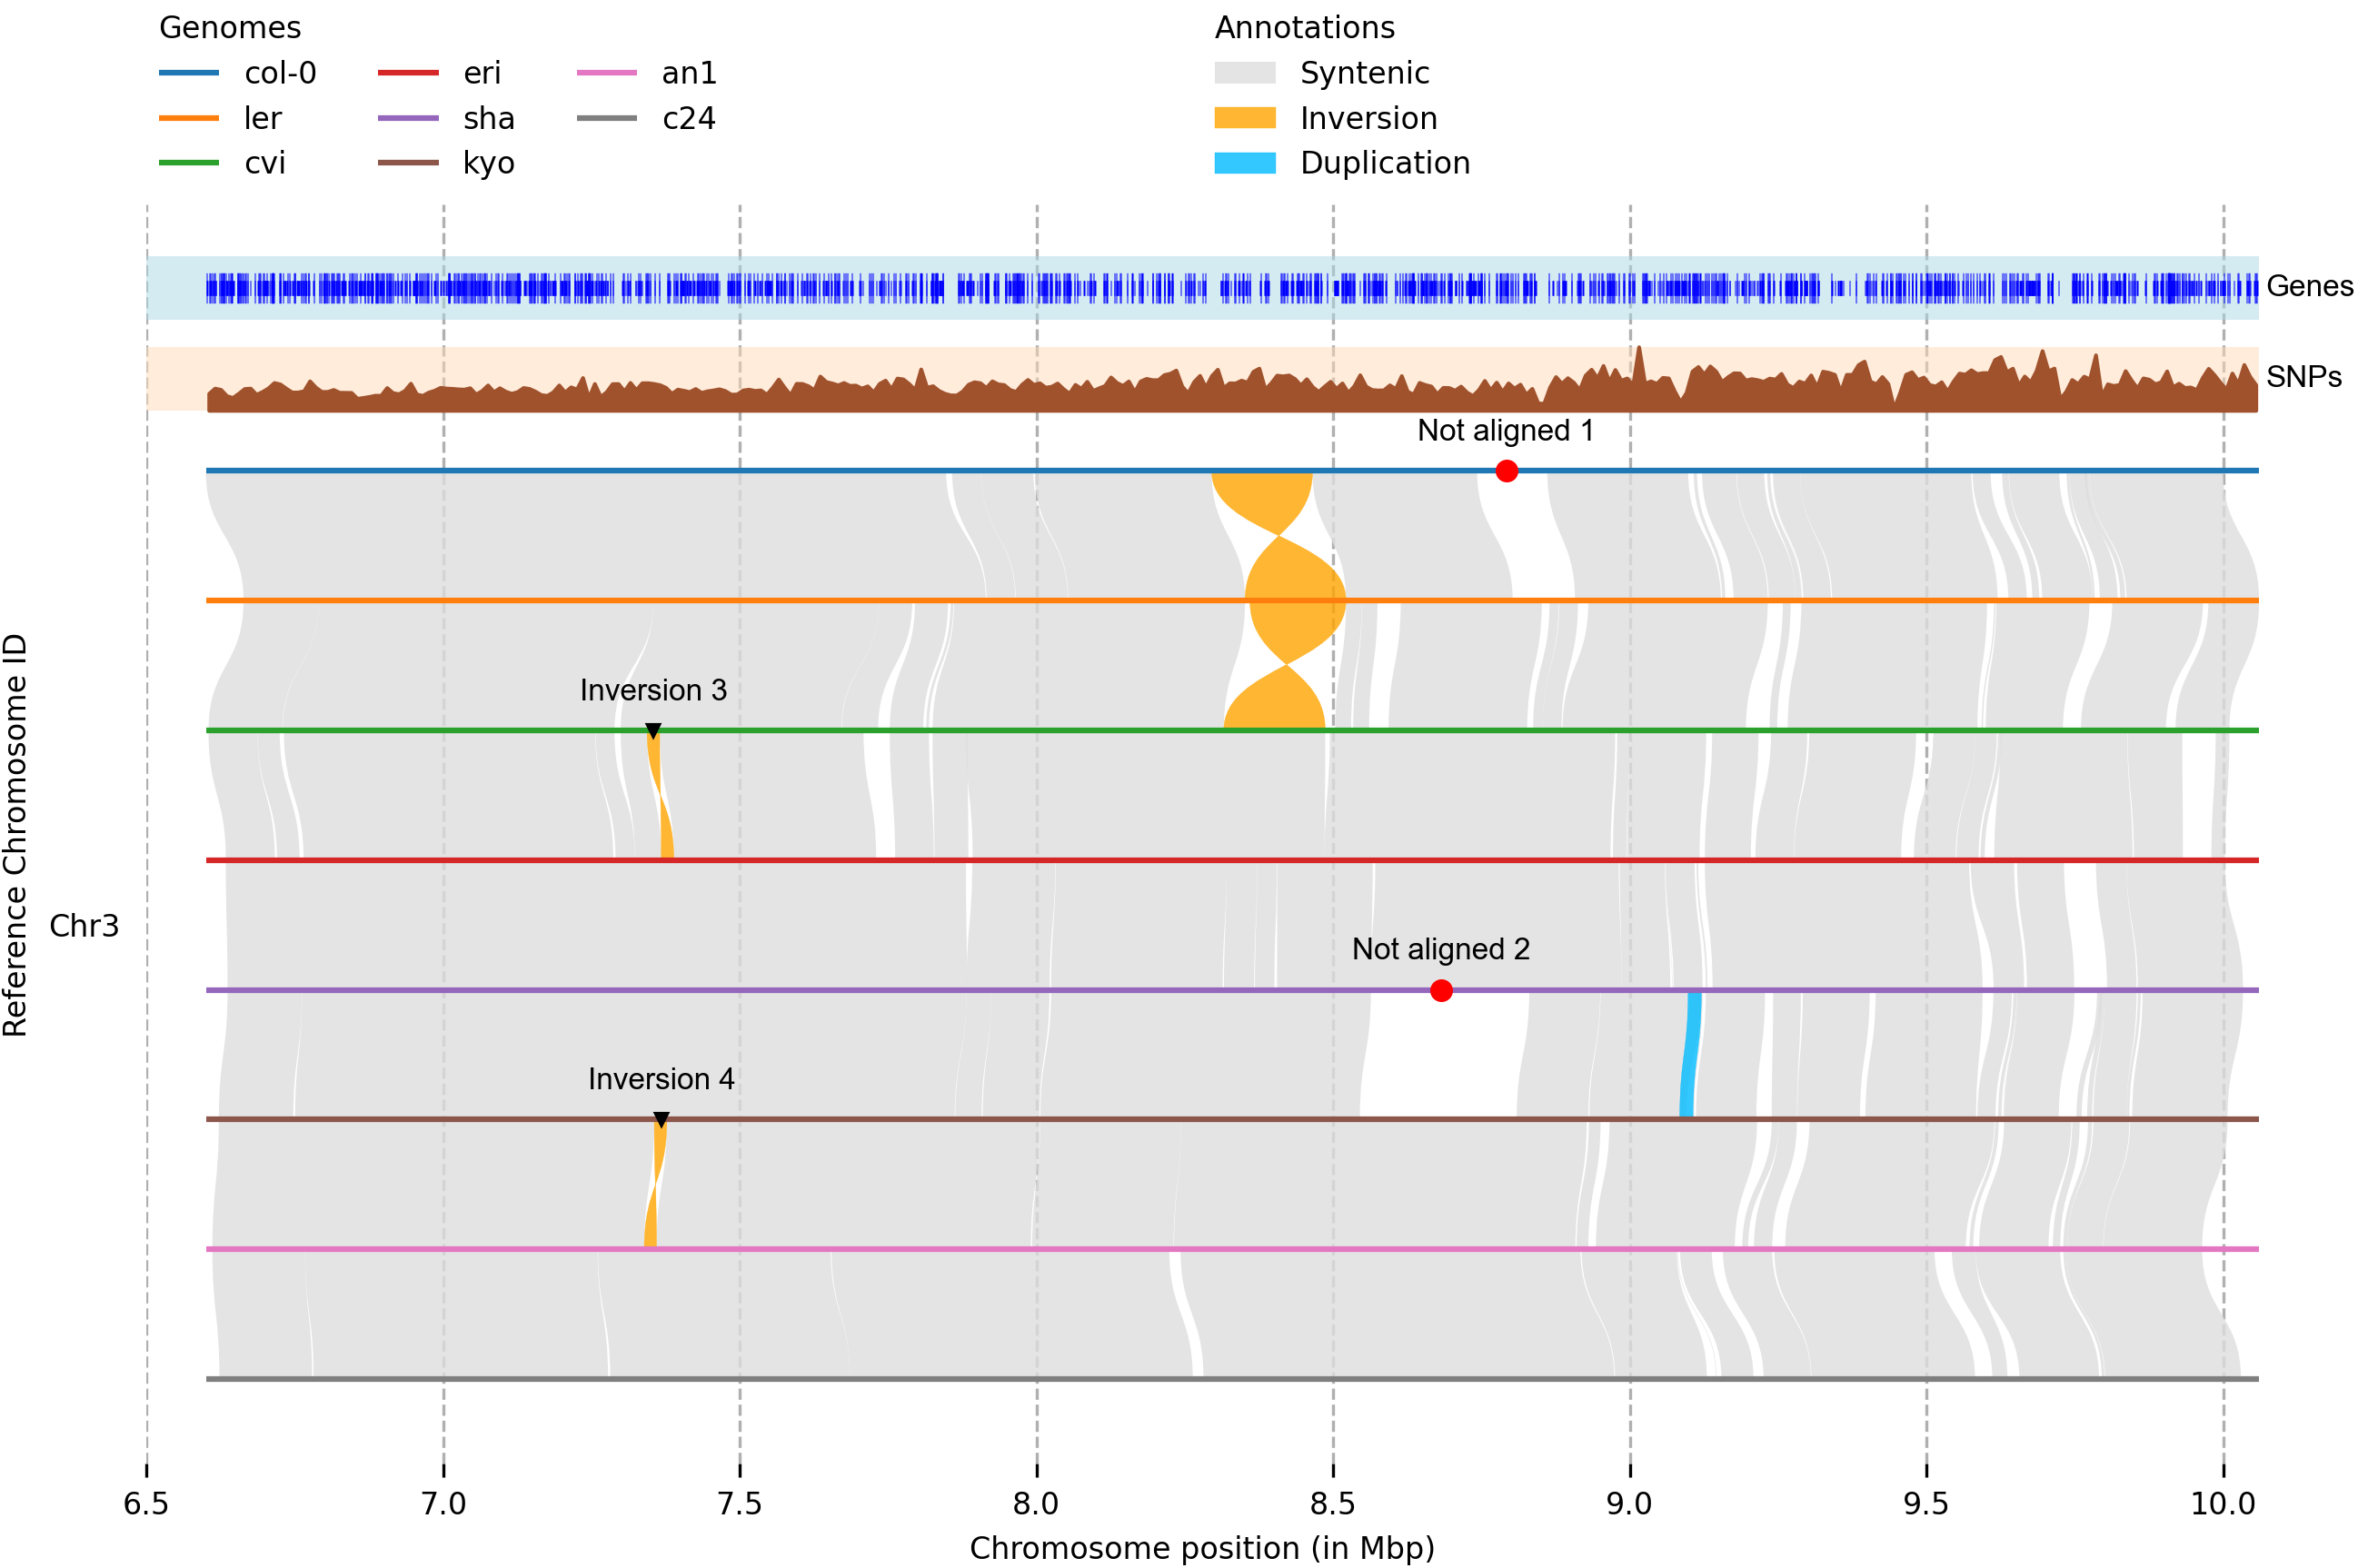
全基因组比对和可视化
1 2 minimap2 -ax asm5 -t 75 --eqx nip.fa R498.chr12.fa | samtools sort -O BAM - > r498.2.nip.bamsort -O BAM - > acuce2r498.bam
水稻基因组4分钟就能比对完。
1 2 syri -c r498.2.nip.bam -r nip.fa -q R498.chr12.fa -F B --prefix r498.2.nip &
1 2 3 4
1 plotsr --sr acuce2r498syri.out --genomes genomes.txt -o acuce2r498.plotsr.png
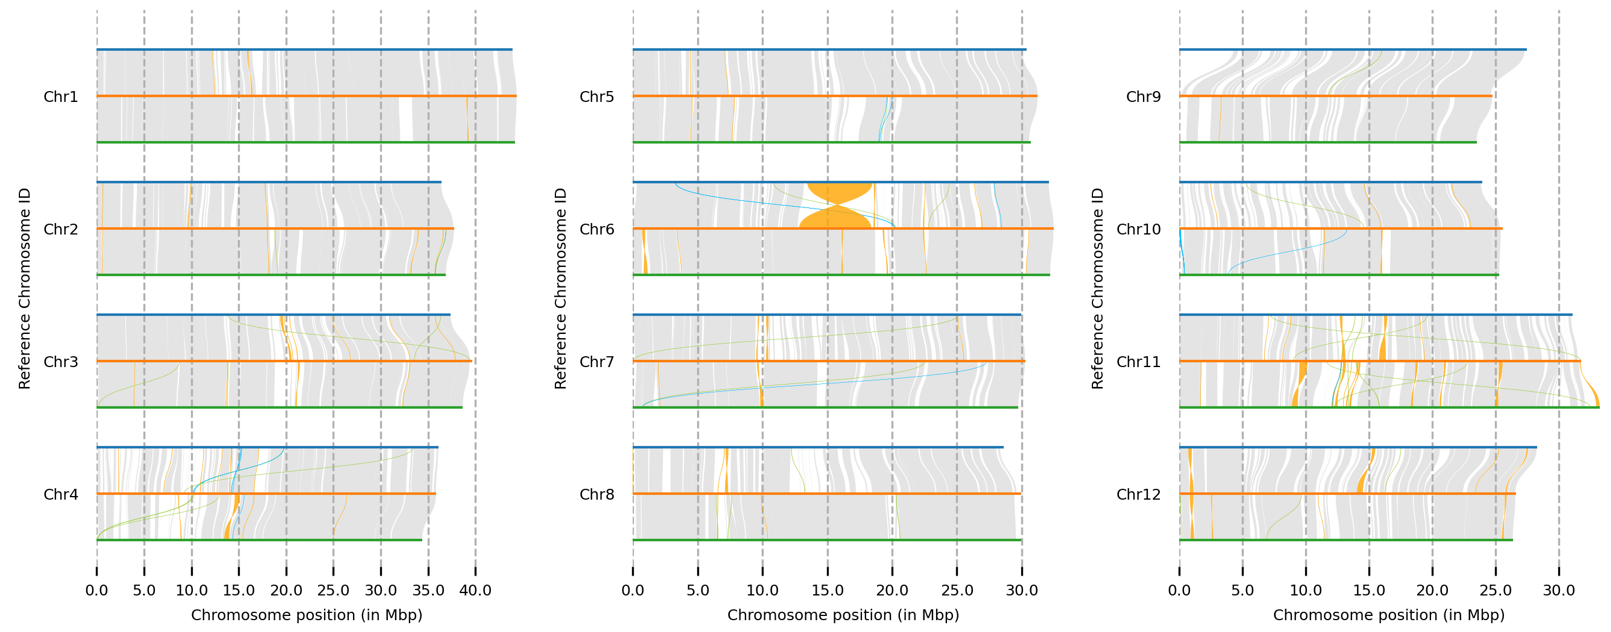
选择展示特定染色体:
1 plotsr --chr Chr5 --chr Chr6 --chr Chr7 --chr Chr8 --sr r498.2.nipsyri.out --sr acuce2r498syri.out --genomes genomes.txt -o nipponbare.r498.acuce.sr.plot.chr5-8.png
群体遗传学 参考这个文章进行分析:
Jing C Y, Zhang F M, Wang X H, et al. Multiple domestications of Asian rice[J]. Nature Plants, 2023: 1-15.
软件安装 基本上用mamba就能完成所有安装,比较坑的是GATK依赖的版本和其他软件的依赖有冲突,因此GATK需要单独创建一个环境。流程代码也需要修改,按大步骤分开运行。
基因组比对 主要分为两步:构建基因组索引和将测序数据比对到参考基因组上。
构建基因组索引 1 2 3 4 5 6 7 8 9 10 11
运行完成后得到的文件:
1 2 3 4 5 6 7 8 9 10 -rw-rw-r-- 1 lixiang lixiang 1.5K 8月 27 10:30 genome.dict
比对 将比对的结果直接传给samtools完成bam文件的排序:
1 bwa mem -M -t 50 -R "@RG\tID:s-100_H7GYJCCXY_L4\tSM:s-100_H7GYJCCXY_L4\tPL:illumina" 03.genome/genome.fa 02.data/yyt.reseq/s-100_H7GYJCCXY_L4_1.clean.fq.gz 02.data/yyt.reseq/s-100_H7GYJCCXY_L4_2.clean.fq.gz | samtools sort -@ 50 -m 8G -o 04.bwa.mapping/s-100_H7GYJCCXY_L4.sorted.bam
-R这个参数必须有,不然后面GATK会报错。
耗时20分钟左右。
变异检测 主要是使用GATK4完成分析的。关于GATK4内存和线程数的使用,可以参考微信公众号文章
标记重复 使用MarkDuplicates对重复序列进行标记。这个模块在GATK4和picard中都有。picard可以一步同时完成重复序列标记和构建索引,GATK需要分为两步。
1 picard -Xmx400g MarkDuplicates I=04.bwa.mapping/s-100_H7GYJCCXY_L4.sorted.bam O=05.deduplicates/s-100_H7GYJCCXY_L4.sorted.bam CREATE_INDEX=true REMOVE_DUPLICATES=trueu M= 05.deduplicates/s-100_H7GYJCCXY_L4.txt
1 gatk --java-options "-Xmx20G -XX:ParallelGCThreads=8" MarkDuplicates --REMOVE_DUPLICATES false -I 04.bwa.mapping/s-100_H7GYJCCXY_L4.sorted.bam -O 05.deduplicates/s-100_H7GYJCCXY_L4.gatk.bam -M 05.deduplicates/s-100_H7GYJCCXY_L4.gatk.metrc.csv
耗时9分钟左右。
构建bam文件索引:
1 samtools index -@ 20 05.deduplicates/s-100_H7GYJCCXY_L4.gatk.bam
变异检测 使用HaplotypeCaller模块进行变异检测,生成gvcf文件。只支持单样本。
1 gatk --java-options "-Xmx20G -XX:ParallelGCThreads=8" HaplotypeCaller -R 03 .genome/genome.fa -I 05 .deduplicates/s-100 _H7GYJCCXY_L4.gatk .bam -O 06 .haplotypecaller/s-100 _H7GYJCCXY_L4.gvcf .gz -ERC GVCF
从二代数据鉴定R基因 基因组下载 下载参考基因组数据。
1 2 3 4 get https://www.mbkbase.org/R498/R498_Chr.soft.fasta.gz
Blast比对 核酸序列建库疯狂报错:
1 BLAST Database error: No alias or index file found for protein database [./blastdb/piapik] in search path [/sas16t/lixiang/yyt.reseq/02.blast::]
换蛋白序列建库比对:
1 2 makeblastdb -in piapik.fa -dbtype prot -out blastdb/piapik
提取gff文件和基因序列 提取gff文件:
1 2 grep "OsR498G1119642600.01" R498_IGDBv3_coreset/R498_IGDBv3_coreset.gff > pia.gff"OsR498G1120737800.01" R498_IGDBv3_coreset/R498_IGDBv3_coreset.gff > pik.gff
提取基因序列:
1 2 type ="gene" 's/"/\t/g' piapik.gff | awk -v type ="${type} " 'BEGIN{OFS=FS="\t"}{if($3==type) {print $1,$4-1,$5,$14,".",$7}}' > piapik.bed
提取蛋白序列和CDS序列用于后续的SnpEff:
1 2 seqkit grep -f piapik.cds.id.txt genome.cds.fa > piapik.cds.fa
将这些文件拷贝到SnpEff文件夹:
1 2 3 4 5 cp ../../../01.data/genome/piapik.fa sequences.facp ../../../01.data/genome/piapik.gff genes.gffcp ../../../01.data/genome/R498_IGDBv3_coreset/piapik.cds.fa cds.facp ../../../01.data/genome/R498_IGDBv3_coreset/piapik.pro.fa ./protein.facp PiaPik/sequences.fa ./genomes/PiaPik.fa
构建索引 1 2 3 bwa index 01.data/genome/piapik.fa
SnpEff索引 1 java -jar /home/lixiang/mambaforge/envs/gatk4/share/snpeff-5.1-2/snpEff.jar build -c snpEff.config -gff3 -v PiaPik -noCheckCds -noCheckProtein
批量运行 1 2 3 4 5 6 7 8 9 10 11 12 13 14 15 16 17 18 19 20 21 22 23 24 25 26 27 28 29 30 31 32 33 34 35 36 37 38 39 40 41 42 43 44 45 46 47 48 49 50 51 52 53 54 55 56 57 58 59 60 61 62 63 64 65 66 67 68 69 70 71 72 73 74 75 76 77 78 79 80 81 82 83 84 85 86 87 88 89 90 91 92 93 94 95 96 rm (list = ls ())dir ("./01.data/clean.data/" ) %>% "file" ) %>% "\\." ) %>% "[" , 1) %>% "01.data/genome/piapik.fa " for (i in unique(samples$sample )) {if (file.exists(sprintf("./03.mapping/%s.sorted.mapped.bam" ,i))) {else {"./01.data/clean.data/%s_1.clean.fq.gz" ,i)"./01.data/clean.data/%s_2.clean.fq.gz" ,i)"\"@RG\\tID:%s\\tSM:%s\\tPL:illumina\"" ,i,i)"./03.mapping/%s.sorted.bam" ,i)"bwa mem -M -t 75 -R %s %s %s %s | samtools sort -@ 50 -m 8G -o %s" ,title, genome, f.read, r.read, bam) %>% "samtools view -bF 12 -@ 75 03.mapping/%s.sorted.bam -o 04.sorted.bam/%s.sorted.mapped.bam" ,i,i) %>% "samtools index -@ 75 -bc 04.sorted.bam/%s.sorted.mapped.bam" ,i) %>% "samtools coverage ./04.sorted.bam/%s.sorted.mapped.bam > 05.converage/%s.coverage.txt" ,i,i) %>% "picard -Xmx400g MarkDuplicates I=04.sorted.bam/%s.sorted.mapped.bam O=06.picard/%s.picard.bam CREATE_INDEX=true REMOVE_DUPLICATES=trueu M=06.picard/%s.txt" ,i, i, i) %>% "gatk --java-options \"-Xmx20G -XX:ParallelGCThreads=8\" HaplotypeCaller -R 01.data/genome/piapik.fa -I 06.picard/%s.picard.bam -O 07.gatk/%s.gvcf -ERC GVCF" ,i,i) %>% "gatk GenotypeGVCFs -R 01.data/genome/piapik.fa -V 07.gatk/%s.gvcf -O 07.gatk/%s.vcf" ,i,i) %>% "java -Xmx10G -jar ~/mambaforge/envs/gatk4/share/snpeff-5.1-2/snpEff.jar ann -c 08.snpeff/snpEff.config PiaPik 07.gatk/%s.vcf > 08.snpeff/%s.ann.vcf -csvStats 08.snpeff/%s.positive.csv -stats 08.snpeff/%s.positive.html" ,i,i,i,i) %>% "./run.all.sh" , col.names = FALSE, row.names = FALSE, quote = FALSE)
合并覆盖度 1 2 3 4 5 6 7 8 9 10 11 12 13 14 15 16 dir ("./05.converage/" ) %>% "file" ) -> coveragefor (i in coverage$file ) {"./05.converage/%s" ,i) %>% ".coverage.txt" ,"" )) %>% "./all.coverage.txt" , sep = "\t" , quote = FALSE, row.names = FALSE)
判断突变类型 1 2 3 4 5 6 7 8 9 10 11 12 13 14 15 16 17 18 19 20 21 22 23 24 25 26 27 28 29 30 31 32 33 34 35 36 37 38 39 40 41 42 43 44 45 46 rm (list = ls ())"./01.data/genome/piapik.gff" , col_names = FALSE) %>% "HROM" ,"gene.region" ,"start" ,"end" )) %>% "exon" ) %>% "\\." ,"_" ))-> df.gffdir ("./08.snpeff/" ) %>% "vcf" ) %>% "ann.vcf" ))-> vcffor (i in vcf$vcf ) {"./08.snpeff/%s" ,i) %>% "HROM" , "POS" , "ID" , "REF" , "ALT" , "QUAL" , "FILTER" , "INFO" , "FORMAT" , "sample" )) %>% ";" ) %>% "[" ,12) %>% "\\|" ) %>% "[" ,2),";" ) %>% "[" ,12) %>% "\\|" ) %>% "[" ,6),";" ) %>% "[" ,12) %>% "\\|" ) %>% "[" ,11)) %>% "Exon" , TRUE ~ "Non-exon" )) %>% "Exon" ) %>% "chrom" , "position" , "id" , "ref" , "alt" , "mutation.type" , "mutation.region" , "mutation.protein" )) %>% ".ann.vcf" ,"" )) %>% "OsR498G1119642600_01" ~ "Pia" , TRUE ~ "Pik" )) %>% "./all.vcf.txt" , sep = "\t" , quote = FALSE, row.names = FALSE)
扩增子 软件安装 数据处理 数据抽平 1 2 3 4 5 6 7 :: rrarefy( ( df.kraken2.raw.count) , min ( colSums( df.kraken2.raw.count) ) ) %>% ( ) %>% ( ) -> df
宏基因组
软件安装 1 2 3 4 5 mamba install -c bioconda kraken2
数据库配置 Kraken2数据库 点击访问kraken2官方网站 。
可以直接从国家微生物数据科学中心 下载,下载链接:ftp://download.nmdc.cn/tools/meta/kraken2/ . 下载完成直接解压可以使用了:
1 2 3 4 5 6 7 8 9 10 11 12 13 14 15 rw-r--r-- 1 lixiang lixiang 3.4M 3月 11 04:37 database100mers.kmer_distrib
点击下载查看官方完整使用教程 。
CheckM2数据库 参考文献:
CheckM2: a rapid, scalable and accurate tool for assessing microbial genome quality using machine learning
公众号解读:
Nautre 方法 | CheckM2 基于机器学习快速、可扩展和准确地评估微生物基因组质量
根据官方文档 直接使用下面的命令下载配置数据库:
1 checkm2 database --download --path ~/database/checkm2
下载速度还行,校园网可以达到5M/s左右。
下载完成后使用下面的代码测试有没有安装配置成功:
没问题的话会输出:
1 2 3 4 5 6 7 8 9 10 11 12 13 14 15 16 17 [08/13/2023 09:35:33 AM] INFO: Test run: Running quality prediction workflow on test genomes with 50 threads.test genomes.in 3 bins with 50 threads:for 3 bins with 50 threads:for details. Results:
手动配置现有数据库:
1 checkm data setRoot /sas16t/lixiang/database/checkm
GTDB-TK数据库 安装完成后会提示配置数据库:
1 2 3 4 5 6 7 8 9 10 11 12 13 14 15 16 17 Automatic:command "download-db.sh" to automatically download and extract to:"/path/to/target/db" --strip 1 > /dev/nullrm gtdbtk_r207_v2_data.tar.gzenv config vars set GTDBTK_DATA_PATH="/path/to/target/db"
由于mamba是安装在home目录下的,数据库比较占空间,所以手动下载数据库放到其他盘,然后在.zshrc文件中写这样一句配置(PS:尝试过将数据库软连接到/home/lixiang/mambaforge/envs/metagenome/share/gtdbtk-2.1.1/db/,没有成功):
1 GTDBTK_DATA_PATH="/sas16t/user/database/gtdb.v207/"
然后进行测试是否配置成功:
1 2 3 4 5 6 7 8 >gtdbtk test test for publication of new taxonomic designations. New designa <TEST OUTPUT> [2023-08-13 16:40:26] INFO: Done.
如果配置失败的话可以使用下面的代码进行配置:
1 mamba env config vars set GTDBTK_DATA_PATH="/sas16t/lixiang/database/gtdb.v207/"
再运行gtdbtk check_install验证是否安装成功:
1 2 3 4 5 6 7 8 9 10 11 12 13 14 15 16 17 18 19 20 21 22 23 24 25 [2023-09-07 15:19:51] INFO: GTDB-Tk v2.3.0
还需要配置Mash数据库,数据库下载地址:https://figshare.com/articles/online_resource/Mash_Sketched_databases_for_Accessible_Reference_Data_for_Genome-Based_Taxonomy_and_Comparative_Genomics/14408801
下载解压后放在GTDB数据库下的mash文件夹内即可。
1 2 3 4 5 6 7 8 9 -rw-rw-r-- 1 lixiang lixiang 138M 9月 7 15:38 Bacteria_Archaea_type_assembly_set.msh
Kraken 数据库配置查看上一节。
使用方法如下:
1 kraken2 --db /path/to/kraken2数据库 --threads 50 --report sample.kraken2.report --report-minimizer-data --minimum-hit-groups 2 sample.r1.fq.gz sample.r2.fq.gz > sample.kraken2
从report中提出结果:
1 awk '$6 == "S" {print}' sample.kraken2.report > sample.kraken2.count.txt
1 2 3 4 5 6 7 8 9 10 0.05 36989 36989 145318 94971 S 2782665 Bradyrhizobium sp. 200
包括 6 列,方便整理下游分析。
百分比
count
count 最优
(U) nclassified, (R) oot, (D) omain, (K) ingdom, (P) hylum, (C) lass, (O) rder, (F) amily, (G) enus, or (S) pecies. “G2” 代表位于属一种间
NCBI 物种 ID
科学物种名
加了参数--report-minimizer-data后会多输出两列,也就是第四列和第五列。
也可以搭配bracken使用:
1 bracken -d /path/to/kraken2数据库 -l S -r 100 -t 50 -i sample.kraken2.report -o sample.bracken -w sample.brackenw
输出结果:
1 2 3 4 5 6 7 8 9 10 name taxonomy_id taxonomy_lvl kraken_assigned_reads added_reads new_est_reads fraction_total_reads
组装和评估 组装直接使用MetaWRAP的功能模块即可:
1 metawrap assembly -1 ./03.each.sample/SRR9948796/2.clean.reads/SRR9948796_1.fastq -2 ./03.each.sample/SRR9948796/2.clean.reads/SRR9948796_2.fastq -m 200 -t 60 --megahit -o ./03.each.sample/SRR9948796/3.assembly
质量评估使用QUAST:
1 quast -t 70 ./03.each.sample/SRR9948809/3.assembly/final_assembly.fasta -o ./09.assembly.quality/SRR9948809
基因丰度 使用prodigal完成基因预测:
1 prodigal -p meta -a ./10.assembly.gene.prediction/SRR16798125.final_assembly.pep -d ./10.assembly.gene.prediction/SRR16798125.final_assembly.cds -f gff -g 11 -o ./10.assembly.gene.prediction/SRR16798125.final_assembly.gff -i ./03.each.sample/SRR16798125/3.assembly/final_assembly.fasta > ./10.assembly.gene.prediction/SRR16798125.prodigal.log
分箱策略
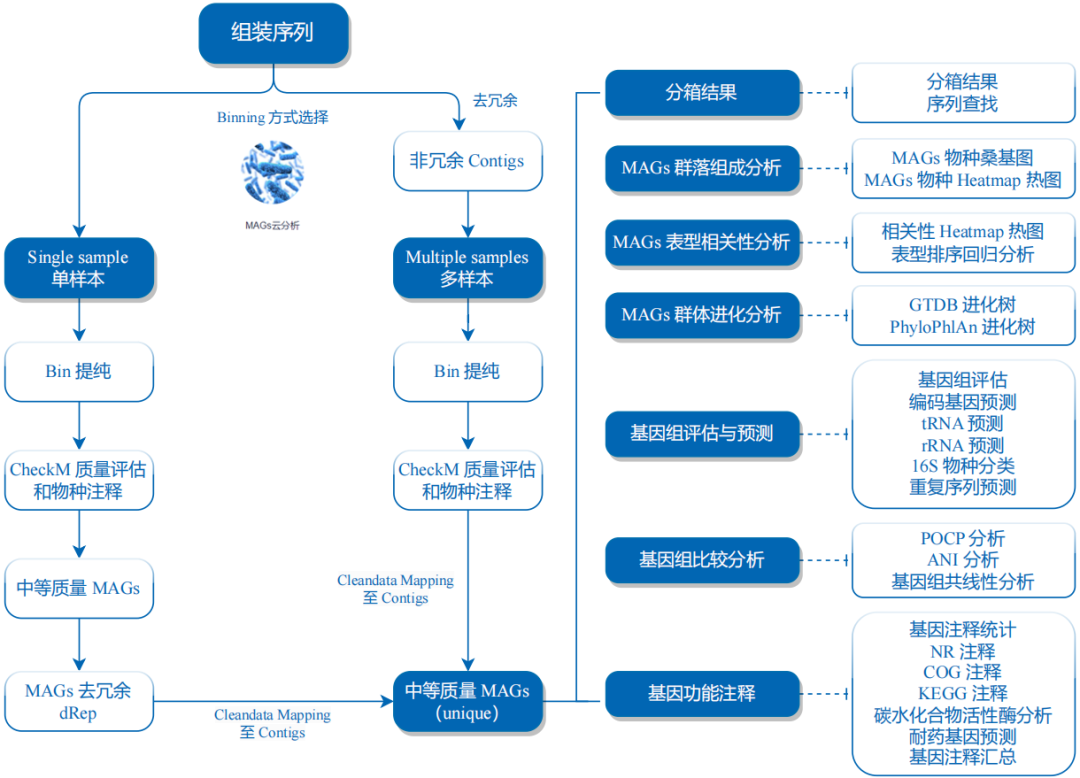
总体思路:三种不同的分箱软件→分箱优化→去重→分类注释和功能注释。
分箱质检 CheckM2 1 checkm2 predict --threads 50 -x .fa --input 07.all.init.bins/bins/ --output-directory 07.all.init.bins/checkm2 > checkm2.log
其中:
分箱聚类 fastANI 平均核苷酸一致性Average Nucleotide Identity (ANI),参考下面这篇文献使用fastANI:
Levin D, Raab N, Pinto Y, et al. Diversity and functional landscapes in the microbiota of animals in the wild[J]. Science, 2021, 372(6539): eabb5352.
1 fastANI -t 70 --rl 15.bins.ANI/all.bins.id.txt --ql 15.bins.ANI/all.bins.id.txt -o 15.bins.ANI/all.bins.fastANI.txt
2400对,跑了36分钟。
用ANI聚类的阈值是89:
The cutoff for hierarchical clustering was set while minimizing both over
ANI大于95的bins进行合并(但是如果分类注释的时候是不同的分类水平则拆分开):
Then, clusters for which all bins had ANI greater than 95 were merged.
每个cluster代表性的bins如何挑选呢:
For each cluster the representative genome was set based on the following
在这个文献中还提到了根据ANI的值来判断MAG是全新的还是已经被报道过的。
The maximum ANI values were used for novelty categorization as follows: rSGBs with maximum ANI values above 95% were defined as known species, values below 83% as previously undescribed (novel) species, and values in between as intermediate.
可以以proGenomes(一共有4305248个contigs)作为参考基因组,参考文献:
Mende D R, Letunic I, Huerta-Cepas J, et al. proGenomes: a resource for consistent functional and taxonomic annotations of prokaryotic genomes[J]. Nucleic acids research, 2016: gkw989.
点击访问下载地址 。
使用案例:
1 2 fastANI -q ../13.bins.class/data/SRR10695388_concoct_bin.1.fa -r /sas16t/lixiang/database/progenomes/progenomes3.contigs.representatives.fasta -
分箱注释 GTDB 使用GTDB进行注释:
1 gtdbtk classify_wf --cpus 60 --mash_db /sas16t/lixiang/database/gtdb.v207/mash -x fa --genome_dir data --out_dir ./
输出这些文件:
1 2 3 4 5 6 7 8 9 drwxrwxr-x 2 lixiang lixiang 4.0K 9月 7 15:59 align
构建系统发育树:
1 gtdbtk infer --cpus 60 --msa_file align/gtdbtk.bac120.user_msa.fasta.gz --out_dir ./
1 2 3 4 5 6 7 8 9 10 11 drwxrwxr-x 2 lixiang lixiang 4.0K 9月 7 15:59 align
gtdbtk.unrooted.tree就是需要的树文件 。
分箱去重 有时候分箱得到的结果是非冗余的,也就是部分bins基本是一样的,这时候就需要去重。可以使用dRep进行去重。dRep参考文献:
Olm M R, Brown C T, Brooks B, et al. dRep: a tool for fast and accurate genomic comparisons that enables improved genome recovery from metagenomes through de-replication[J]. The ISME journal, 2017, 11(12): 2864-2868.
有几个软件比较难安装:
使用方法:
1 dRep dereplicate drep.res -g data/*.fa
输出的提示信息:
1 2 3 4 Dereplicated genomes................. /home/lixiang/project/pn.metagenomics/temp/drep.res/dereplicated_genomes/
目录dereplicated_genomes是去重后的bins.
分箱建树 使用PhyloPhlAn 3.0构建系统发育树 。参考文献:
Asnicar F, Thomas A M, Beghini F, et al. Precise phylogenetic analysis of microbial isolates and genomes from metagenomes using PhyloPhlAn 3.0[J]. Nature communications, 2020, 11(1): 2500.
下载数据库
下载了直接解压就行:
1 2 http://cmprod1.cibio.unitn.it/databases/PhyloPhlAn/amphora2.tar
生成配置文件 通常是使用蛋白序列进行建树,类似于OrthoFinder。
1 phylophlan_write_config_file -o 17.bins.tree/config_aa.cfg --force_nucleotides -d a --db_aa diamond --map_aa diamond --msa mafft --trim trimal --tree1 fasttree --tree2 raxml --overwrite
配置文件示例:
1 2 3 4 5 6 7 8 9 10 11 12 13 14 15 16 17 18 19 20 21 22 23 24 25 26 27 28 29 30 31 32 33 34 35 36 37 38 39 40 41 42 43 44 45 46 47 48 49 50 [db_aa]in id 50 --max-hsps 35 -k 0in
构建进化树 1 nohup phylophlan -d phylophlan --databases_folder ~/lixiang/database/phylophlan3/ -t a -f 17.bins.tree/config_aa.cfg --nproc 60 --diversity medium --fast -i 17.bins.tree/pep -o 17.bins.tree > phylophlan.log 2>&1 &
系统发育树可视化使用iTOL完成。
参考文献
Uritskiy G V, DiRuggiero J, Taylor J. MetaWRAP—a flexible pipeline for genome-resolved metagenomic data analysis[J]. Microbiome, 2018, 6(1): 1-13.
软件安装 软件地址:https://github.com/bxlab/metaWRAP . 软件的依赖非常非常多,我是这样安装成功的:
1 mamba create -y --name metawrap-env --channel ursky metawrap-mg=1.3.2
检查是否安装成功:
1 2 3 4 5 6 7 8 9 10 11 12 13 14 15 16 17 18 19 20 21 22 > metawrap -hread QC module (read trimming and contamination removal)help | -h show this help messagewhere the metawrap configuration files are stored
数据库配置 CheckM 1 2 3 4 5 6 mkcd ~/database/checkm
Kraken2 1 2 3 mkcd ~/database/kraken2
NCBI-nt 1 2 3 mkcd ~/database/ncbi.nt
NCBI-taxonomy 1 2 3 mkcd ~/database/ncbi.taxonomy
宿主基因组 以人类的hg38基因组为例。
1 2 3 4 5 6 7 mkcd ~/database/human.genomecat *fa > hg38.farm chr*.fa
修改配置文件 上述数据库下载完成后需要修改MetaWRAP的配置文件,不需要的就注释掉,路径一定要写对,不然会报错的。
1 2 3 4 5 6 7 8 9 10 11 12 13 14 15 16 17 18 vi ~/mambaforge/envs/metawrap-env/bin/config-metawrapwhich metawrap)${mw_path%/*} ${bin_path} /metawrap-scripts${bin_path} /metawrap-modules
主要运行步骤 有一个自定义的脚本:这个脚本的作用是修改bins的编号,有时候编号太长了后面的步骤会报错。
1 2 3 4 5 6 7 8 9 10 11 12 13 14 15 16 17 18 19 20 21 22 import sys1 ]2 ]3 ]0 with open (fasta_file, "r" ) as f, open (out_file, "w" ) as out, open (index_file, "w" ) as index:for line in f:if line.startswith(">" ):1 ">seq{0}\n" .format (i))">" ,"" )">seq" + str (i)str (new_id) + "\t" + old_id)else :print ("Done." )
每一步程序:
1 2 3 4 5 6 7 8 9 10 11 12 13 14 15 16 17 18 19 20 21 22 23 24 25 26 27 28 29 30 31 32 33 34 35 36 37 38 39 40 41 42 43 44 45 46 47 48 49 50 51 for F in 0.data/*_1.fastq; do R=${F%_*} _2.fastq; BASE=${F##*/} ; SAMPLE=${BASE%_*} ; metawrap read_qc --skip-bmtagger -1 $F -2 $R -t 70 -o 1.read.qc/$SAMPLE & done mkdir -p 2.clean.reads/allfor i in 1.read.qc/*; do ${i#*/} mv ${i} /final_pure_reads_1.fastq 2.clean.reads/${b} _1.fastqmv ${i} /final_pure_reads_2.fastq 2.clean.reads/${b} _2.fastqdone cat 2.clean.reads/*_1.fastq > 2.clean.reads/all/all_reads_1.fastqcat 2.clean.reads/*_2.fastq > 2.clean.reads/all/all_reads_2.fastqmkdir 9.bin.reassembly/renamed.binsmkdir 9.bin.reassembly/renamed.bins.idfor i in 9.bin.reassembly/reassembled_bins/*; do python3 ~/scripts/rename.fasta.id.py ${i} 9.bin.reassembly/renamed.bins/${i##*/} 9.bin.reassembly/renamed.bins.id/${i##*/} .id.txt; done mkdir 12.eggNOG-mapperfor i in 11.bins.anno/bin_translated_genes/*; do python3 ~/software/eggNOgmapper/emapper.py -m diamond --cpu 60 -i 11.bins.anno/bin_translated_genes/${i##*/} --output 12.eggNOG-mapper/${i##*/} .eggnogmapper.txt; done
MetaWRAP得到的是流程性的结果,个性化分析需要自行完成。
关于组装方法 宏基因组分析中最让人头疼的一个点就是组装的时候需要将所有样品的序列合并后再进行组装(因为某些基因的丰度非常低,单个样品组装的时候无法扫描到),这就需要大量的内存。现在宏基因组的数据量基本上是12G,左右两端加起来就有25G左右,再4个生物学重复,那就是100G了。随着样品数量增多,计算所需的内存数量也随之增加。这也就导致现在的宏基因组文章基本上是单样本组装的,也就是一个生物学重复进行一次组装。这个文章提出一种新的、对大多数研究者有用的组装方式:
Delgado L F, Andersson A F. Evaluating metagenomic assembly approaches for biome-specific gene catalogues[J]. Microbiome, 2022, 10(1): 1-11.
改组装方法可以简单描述如下:
单个样本单独组装;
使用BBnorm对原始数据进行标准化,相当于是随机抽取序列中的一部分,然后把所有数据合并后进行组装;
将上述两种方法得到的组装结果合并,然后使用MMSeqs对结果进行过滤。
NatCom文章方法 这个文章的分析思路比较有意思:
Zeng S, Patangia D, Almeida A, et al. A compendium of 32,277 metagenome-assembled genomes and over 80 million genes from the early-life human gut microbiome[J]. Nature Communications, 2022, 13(1): 5139.
Sciecne 文章方法这篇文章真的是醍醐灌顶啊:
Klapper M, Hübner A, Ibrahim A, et al. Natural products from reconstructed bacterial genomes of the Middle and Upper Paleolithic[J]. Science, 2023, 380(6645): 619-624.
MAG dereplication 在这个文章中提到MAG dereplication,非常有用的:
Using the 459 MAGs that passed the minimum quality requirements, we dereplicated the MAGs using the “dereplicate” command of dRep (103) v3.3.0, performing the primary clustering at 90%, the secondary clustering at 95%, and requiring a coverage threshold (“nc”) of 30%.
MAG taxonomic 这个文章用了两种方法:
GTDBTKSGB:类似与系统发育树的方法检查MAG是否是之前报道过的。
群体遗传 在Jurdzinski K T, Mehrshad M, Delgado L F, et al. Large-scale phylogenomics of aquatic bacteria reveal molecular mechanisms for adaptation to salinity[J]. Science Advances, 2023, 9(21): eadg2059. 看到POGENOM这个方法,找到了原文献:
Sjöqvist C, Delgado L F, Alneberg J, et al. Ecologically coherent population structure of uncultivated bacterioplankton[J]. The ISME journal, 2021, 15(10): 3034-3049.
点击访问GitHub .
DNA甲基化 机器学习方法
Ni P, Nie F, Zhong Z, et al. DNA 5-methylcytosine detection and methylation phasing using PacBio circular consensus sequencing[J]. Nature Communications, 2023, 14(1): 4054.
提取序列 1 ccsmeth call_hifi --subreads 01.data/bam/1.merged.bam --threads 60 --output 07.ccsmeth/01.callhifi/1.callhifi.bam
序列比对 这一步的本质是用pbmm2进行比对 。
1 ccsmeth align_hifi --hifireads 01.data/bam/1.merged.bam --ref 01.data/ref/r498.fa --output 07.ccsmeth/02.alignhifi/1.align.hifi.pbmm2.bam --threads 60
变异检测 1 CUDA_VISIBLE_DEVICES=0 ccsmeth call_mods --input 03.mapping/02.bam/1.bam --re 01.data/ref/r498.fa --model_file 01.data/model_ccsmeth_5mCpG_call_mods_attbigru2s_b21.v2.ckpt --output 07.ccsmeth/03.callmodification/1.callmods --threads 60 --threads_call 60 --model_type attbigru2s --mode align
变异频率 1 2 3 4 5 6 7 8 9 10 11 12 13 14 15 16 17 18 ````
BisMark 1 bismark -q -p 60 --score_min L,0,-0.6 -X 1000 ./06.CpG.methylation.PC/03.bismark.index -1 ./06.CpG.methylation.PC/01.clean.data/CRR190475_f1.fq.gz -2 ./06.CpG.methylation.PC/01.clean.data/CRR190475_r2.fq.gz -o 06.CpG.methylation.PC/04.bismark.bam
